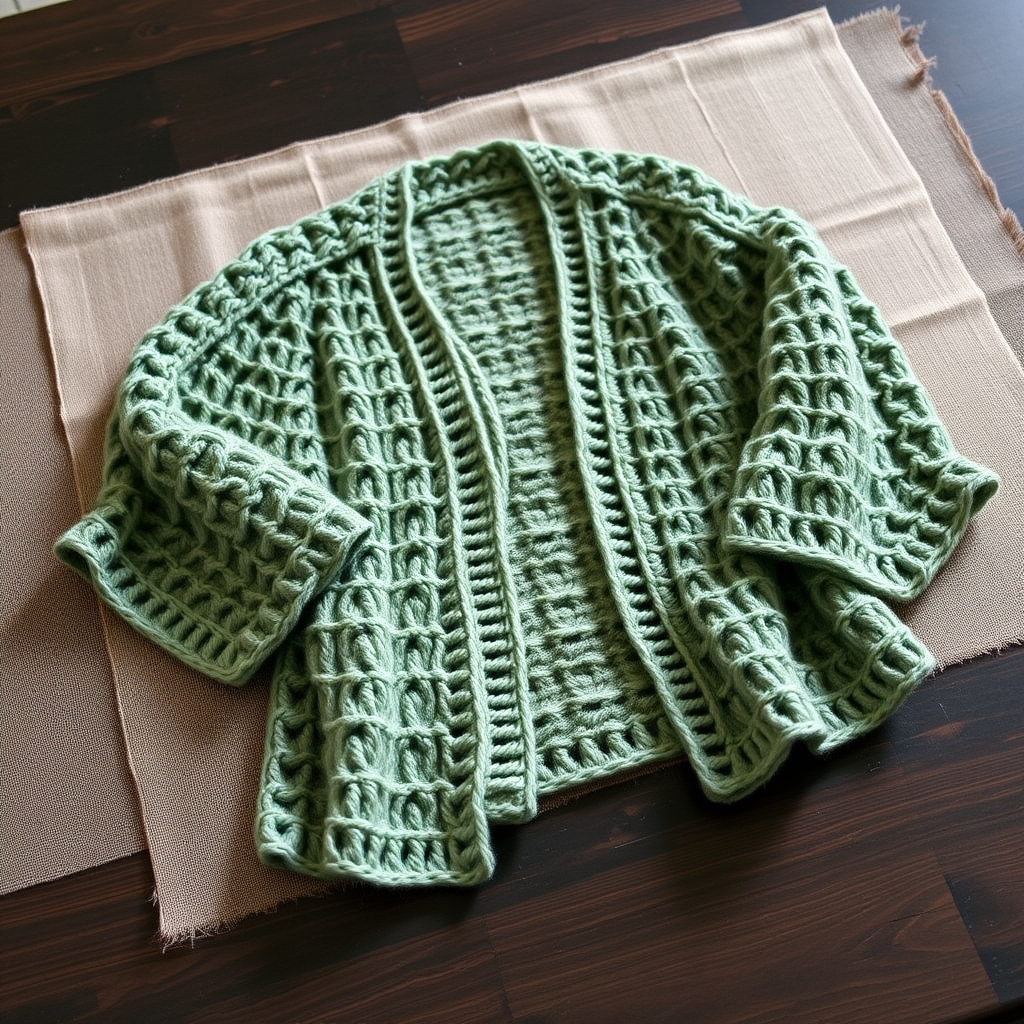
Whispering Heather Hooded Cardigan Free Pattern – A Textured Celtic Knot Wrap

Wrap Yourself in Handmade Luxury: The Whispering Heather Hooded Cardigan
There are certain projects that feel less like crafting and more like creating a wearable hug. The Whispering Heather Hooded Cardigan is exactly that—a stunning, textured layer that combines the nostalgic charm of the granny stitch with the sophisticated depth of Celtic-inspired design. This free pattern is perfect for intermediate crocheters ready to tackle a rewarding, wearable project, and it's an absolute joy for beginners who want to challenge themselves with a clear, step-by-step guide.
Imagine draping yourself in a deep heather purple fabric, accented with a delicate cream trim, on a crisp autumn morning. The dense, woven texture isn't just beautiful; it's incredibly warm and cozy. Because this cardigan is worked in one piece from the bottom up, there's minimal seaming, making the construction surprisingly simple despite its luxurious look. Let's dive into creating this heirloom-quality piece that you'll reach for season after season.
Materials Needed: Gathering Your Highland Essentials
Before you begin, ensure you have all your supplies ready. The quality of your yarn will truly make this project shine, so choose a soft, durable worsted weight yarn that feels good against your skin.
- Yarn (Main Color - MC): Worsted weight yarn in a deep heather purple. You will need approximately 1200 grams (about 1,200 yards). Look for a yarn with subtle tonal variations to mimic the "heather" effect.
- Yarn (Contrast Color - CC): Worsted weight yarn in a soft cream. You will need approximately 300 grams (about 300 yards) for the edging.
- Crochet Hook: US Size I/9 (5.5mm) crochet hook. Ensure you have a comfortable grip, as you'll be using it for a while.
- Other Tools: Yarn needle for weaving in ends, scissors, and stitch markers (optional but helpful for counting clusters).
Gauge: 14 double crochets (dc) x 8 rows = 4 inches in the granny stitch pattern. Always check your gauge first! Adjust your hook size if needed to match this.
Step-by-Step Instructions: Crafting Your Celtic-Inspired Cardigan
This pattern is worked in one piece from the bottom up, then split for the armholes. The beauty of this construction is that you create the entire body seamlessly before adding the sleeves and edging. Let's break it down.
Understanding the Granny Stitch Pattern
The foundation of this cardigan is a simple, rhythmic repeat. Once you get the hang of it, it's incredibly meditative.
- Cluster: 3 double crochets (dc) worked into the same space.
- Pattern Repeat: (3 dc, ch 1) in each ch-1 space from the previous row.
- Turning Chain: Ch 3 counts as the first dc of the row.
Part 1: Creating the Body
Foundation Row: With your Main Color (MC), chain (ch) 142 loosely. This loose foundation is crucial for a stretchy bottom edge.
Row 1: Dc in the 4th ch from your hook. *Ch 1, skip 1 ch, 3 dc in the next ch.* Repeat from * to * across the row, ending with 2 dc in the very last ch. Turn your work. You should have 47 granny clusters.
Row 2: Ch 3 (counts as your first dc), 2 dc in the first ch-1 space. *Ch 1, 3 dc in the next ch-1 space.* Repeat from * to * across the row, ending with 3 dc in the last space. Turn.
Repeat Row 2 until your piece measures 18 inches from the start. This forms the main body of the cardigan, which will wrap around you.
Part 2: Dividing for the Armholes
Now we'll create the openings for your sleeves. This is where the magic of the one-piece construction happens.
Next Row (Dividing Row): Work across the first 10 clusters in your established pattern. Ch 3 (this creates the underarm), skip the next 8 clusters (this is your first armhole), work across the next 11 clusters (this is the back), ch 3, skip the next 8 clusters (this is your second armhole), and finally work across the last 10 clusters. Turn.
Continue in Pattern: Now, simply continue working the granny stitch pattern across all sections—the front, the underarm chains, the back, the other underarm chain, and the other front—for another 10 inches. The ch-3 spaces you created will be worked into just like any other ch-1 space. This creates a seamless, continuous piece.
Part 3: Shaping the Hood
Now we'll build the cozy, generous hood that makes this cardigan so special.
Hood Body: Work across all the stitches of the top edge (both fronts and the back) in your established pattern. Continue working back and forth in rows for 12 inches. This creates a large rectangle of fabric.
Seaming the Hood: Fold the hood rectangle in half, matching the top corners. Use your yarn needle and a length of MC yarn to seam the top edge closed. This creates the rounded back of the hood.
Part 4: Crafting the Sleeves
Time to give your arms some love. The sleeves are worked directly into the armhole openings.
Attach Yarn: Attach your MC yarn at the underarm of one armhole.
Work in the Round: Work 8 clusters around the entire armhole opening in your granny stitch pattern. You will be working in continuous rounds now. Note: You are not turning your work at the end of each round; you are working in a spiral.
Shaping the Sleeve: Continue working in the round for 14 inches total. To create a subtle taper, decrease 1 cluster every 4 inches. To decrease: in one cluster space, work only 2 dc instead of 3. This will gently narrow the sleeve towards the cuff.
Repeat the entire sleeve process for the second armhole.
Part 5: The Finishing Touches - Edging and Trim
This is where the cardigan transforms from beautiful to breathtaking. The cream edging adds a crisp, polished frame.
Attach CC: Attach your Contrast Color (CC) yarn at the bottom right corner of the cardigan.
Round 1: Single crochet (sc) evenly around the entire front opening, up the right front, around the hood edge, and down the left front. Work 1 sc in each dc and 1 sc in each ch-1 space for a clean, even edge.
Rounds 2 & 3: Work 2 more rows of sc in the same manner. This creates a sturdy, neat border.
Picot Edging (Final Row): This delicate touch is the perfect finish. *Sc in the next stitch, ch 3, slip stitch (sl st) in the same stitch.* Repeat from * to * around the entire edge. This creates a series of charming little loops.
Part 6: Final Assembly and Blocking
You're almost there! The final steps are what elevate your work to a professional finish.
Weave in Ends: Carefully weave in all your yarn tails using your yarn needle. Make sure to secure them well so they don't come loose with wear.
Block to Shape: This step is essential for a polished look. Lay your cardigan flat on a blocking mat. Gently pin it to the desired dimensions, paying special attention to the seams and the hood. Mist it with water (or use a steam iron on a low setting, holding it above the fabric) and allow it to dry completely. This will even out your stitches and give the cardigan its beautiful, drapey shape.
And there you have it—your very own Whispering Heather Hooded Cardigan. This isn't just a piece of clothing; it's a testament to your skill and a cozy companion for years to come. Wear it open over a simple tee, or button it up (if you choose to add buttons) for extra warmth. The textured Celtic knots and the soothing heather tones will make this a staple in your handmade wardrobe. Happy crocheting!