Whispering Pines Felted Tote: A Cozy Forest-Inspired Free Pattern
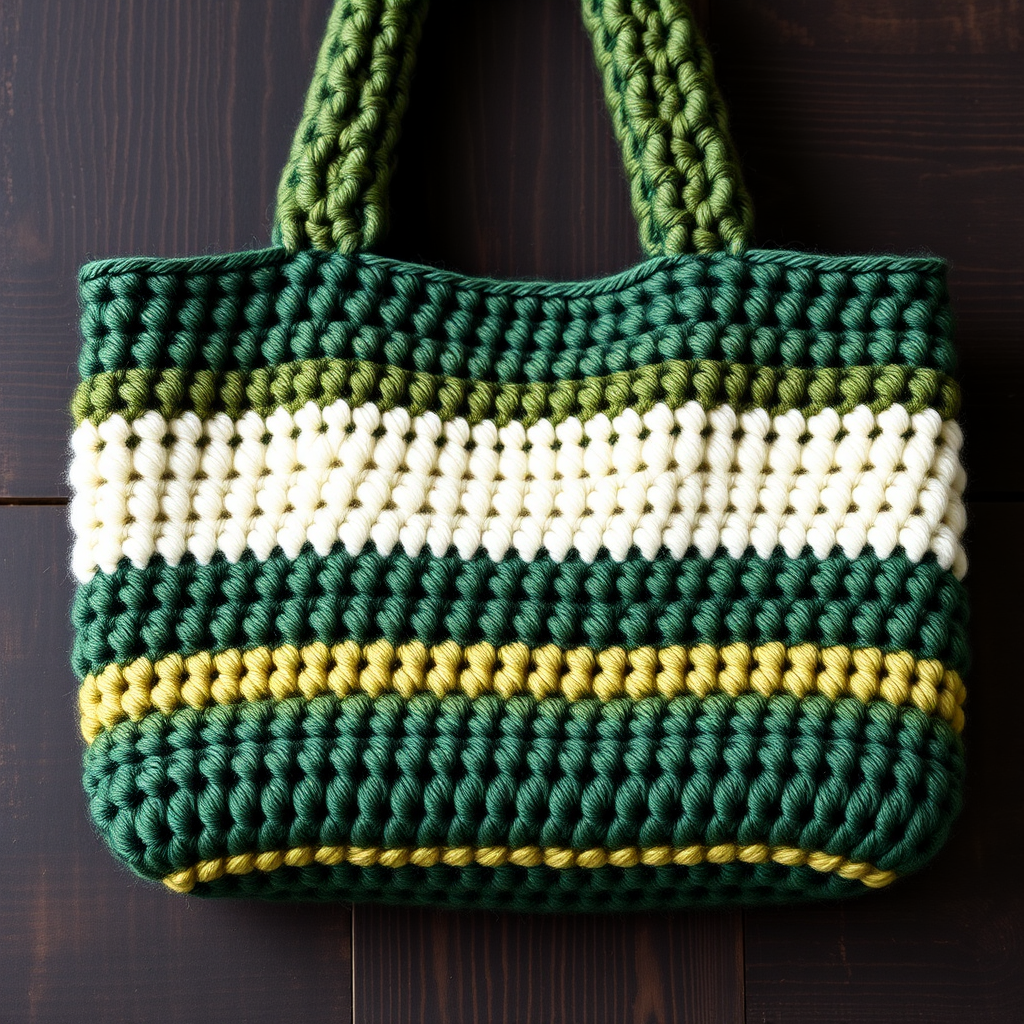
Whispering Pines Felted Tote: A Cozy Forest-Inspired Free Pattern
Imagine carrying a piece of a serene pine forest with you wherever you go. The Whispering Pines Felted Tote brings that vision to life—a soft, textured bag with a modern, nature-inspired aesthetic that's as functional as it is beautiful. This free crochet pattern uses the magical felting process to transform loose, airy stitches into a dense, sturdy fabric that feels like cozy wool felt. Perfect for crafters looking to expand their skills, this project combines basic crochet techniques with the rewarding transformation of wet felting. The result? A structured yet soft tote with three harmonious color bands—deep forest green, soft moss, and creamy off-white—that evoke the quiet beauty of a woodland walk. Let's dive into this cozy, handmade journey!
Materials Needed
Before you begin, gather these essential supplies. Remember, the key to successful felting is using 100% wool yarn—acrylic or superwash wool will not felt properly.
- Yarn: Worsted weight 100% wool yarn (approx. 600-700 yards total) in three colors:
- Forest green (approx. 250-300 yards)
- Moss (approx. 150-200 yards)
- Cream (approx. 150-200 yards)
- Hook: Size J/10 (6.0 mm) crochet hook
- Gauge: 14 sc x 16 rows = 4 inches before felting. Gauge is not critical, but consistent tension helps achieve even felting.
- Extras: Yarn needle for weaving ends, scissors, mild detergent, old jeans (for washing machine friction), and optionally, fabric for lining.
Step-by-Step Instructions
This pattern uses basic single crochet stitches and a felting process. Work with a relaxed tension—looser stitches allow for better shrinkage and a denser felted fabric. Let's begin!
Body of Tote (Worked in One Piece)
The body is crocheted as a flat rectangle, then folded and seamed. This creates a seamless, professional look.
Row 1: With forest green, chain 41. Single crochet (sc) in the 2nd chain from the hook and across. (40 sc). Chain 1, turn.
Rows 2-10: Sc in each stitch across (40 sc). Chain 1, turn. At the end of Row 10, switch to moss color by pulling the new yarn through the last loop of the final stitch.
Rows 11-20: With moss, sc in each stitch across (40 sc). Chain 1, turn. At the end of Row 20, switch to cream.
Rows 21-30: With cream, sc in each stitch across (40 sc). Chain 1, turn. At the end of Row 30, switch to forest green.
Rows 31-40: With forest green, sc in each stitch across (40 sc). Chain 1, turn. Fasten off and weave in all loose ends securely.
Bottom of Tote
Now we'll shape the flat bottom of the bag.
Fold the rectangle in half with the short ends together, right sides facing out. The fold will become the bottom of the tote. Using forest green yarn, single crochet through both layers across the bottom edge to close the seam (40 sc). Fasten off and weave in ends.
Side Seams
With the right side facing you, join forest green yarn at the top corner of one side. Single crochet through both layers down the side seam, working from top to bottom. Repeat on the other side. Fasten off and weave in ends. Your bag body is now complete!
Handles (Make 2)
These sturdy, felted handles are crocheted flat, folded, and sewn for extra strength.
Row 1: With forest green, chain 61. Sc in the 2nd chain from the hook and across (60 sc). Chain 1, turn.
Rows 2-4: Sc in each stitch across (60 sc). Chain 1, turn. Fasten off, leaving a long tail (at least 18 inches) for sewing.
Fold each handle in half lengthwise (so it's now 3 rows thick) and sew the long edges together using the yarn needle and the long tail. This creates a dense, cushioned strap.
Attaching Handles: Position each handle on the inside of the tote, about 3 inches from the top edge and 4 inches apart from the center. Using a whip stitch and the long tail, securely sew the handle ends to the inside of the bag. Make sure they are evenly spaced and firmly attached.
The Felting Process
This is where the magic happens! Felting shrinks the wool and fuses the fibers, creating a dense, water-resistant fabric.
- Place the crocheted tote in a washing machine with a small amount of mild detergent.
- Add a pair of old jeans or a few towels to increase friction, which helps the felting process.
- Set the machine to hot water and a heavy-duty cycle.
- Check the tote every 5-10 minutes to monitor shrinkage. You want the stitches to become completely obscured and the fabric to feel dense and firm.
- Once the desired density is achieved, remove the tote from the washer immediately.
- Rinse in cold water to stop the felting process and remove any soap.
- Gently squeeze out excess water (do not wring) and shape the tote while damp. Pull the sides up and shape the bottom flat.
- Allow to air dry completely, ideally over a form or with towels stuffed inside to maintain the shape.
Finishing Touches
Once your tote is completely dry, it's time for the final details.
- Trim any loose fibers with sharp scissors for a clean, polished look.
- Optional: Add a fabric lining for extra durability and to keep small items from slipping through. Measure the inside of the bag, cut fabric accordingly, and sew it in place by hand.
- Your Whispering Pines Felted Tote is now ready to carry your essentials in cozy, forest-inspired style!
This project is a wonderful way to explore the art of felting while creating a truly unique, handmade accessory. The combination of earthy colors and the soft, matte texture makes this tote a perfect companion for farmers' markets, bookstores, or woodland strolls. Happy crafting!


