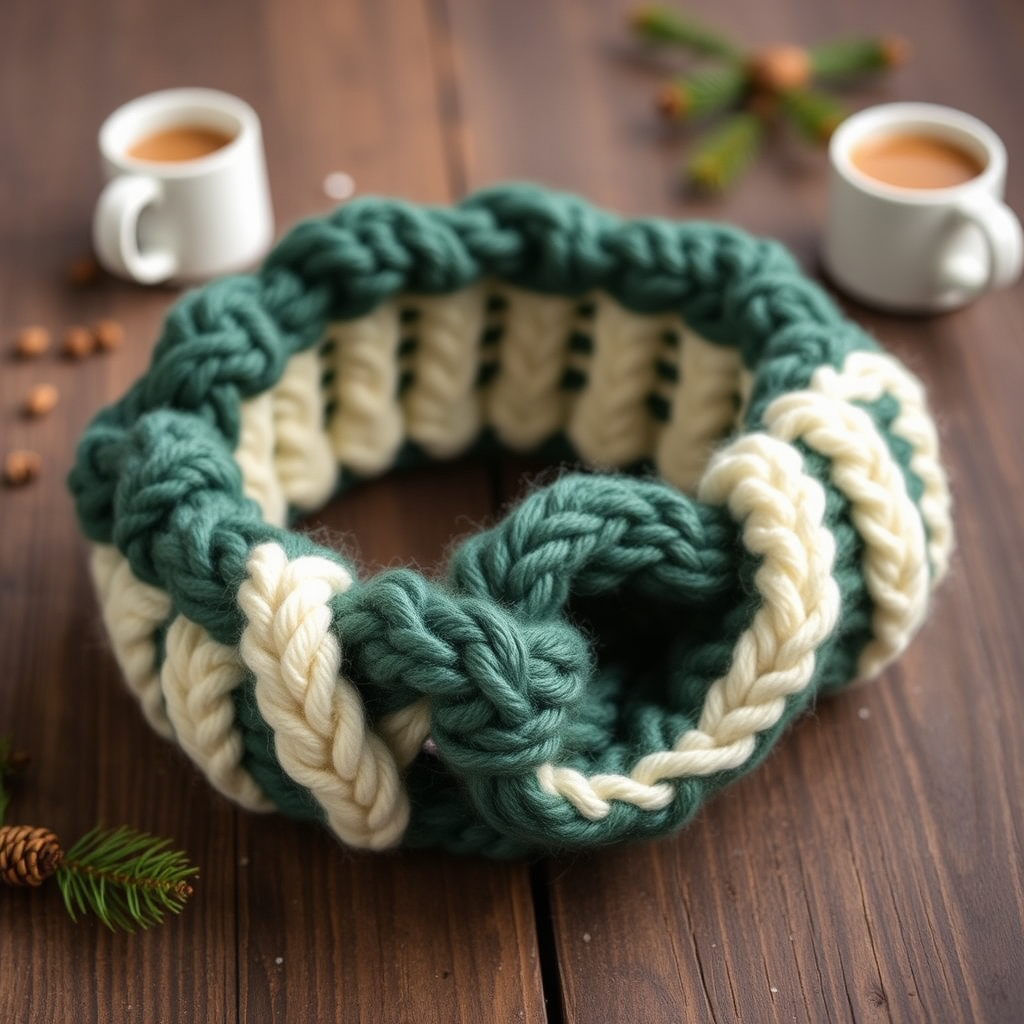
Aurora Alpine Cable Knit Headband Free Pattern

The Aurora Alpine Cable Knit Headband: A Cozy, Quick Knitting Project
Wrap yourself in the cozy luxury of this twisted cable knit headband, featuring a stunning braided center and soft ribbed edges. This quick project uses chunky yarn to create a warm, stylish accessory that's perfect for chilly days. Whether you're a seasoned knitter looking for a satisfying weekend project or a beginner ready to tackle your first cable, this free pattern is designed to guide you every step of the way. The result is a beautifully textured, handcrafted piece that adds a touch of alpine charm to any winter outfit.
This pattern is a fantastic way to learn or practice cable knitting without committing to a large project like a sweater or blanket. The thick yarn and large needles mean it works up in just a couple of hours, making it an ideal gift for friends and family (or a well-deserved treat for yourself). Let's dive into the materials and get those needles clicking!
Materials Needed
Before you begin, gather your supplies. This project requires minimal materials, making it a great stash-buster or a perfect excuse to visit your local yarn shop.
- Yarn: 1 skein of Lion Brand Wool-Ease Thick & Quick (super bulky weight, 80% acrylic, 20% wool) in 'Harbor' (teal) or any color you love. This yarn is soft, warm, and has beautiful stitch definition that makes the cables pop. (Approximately 106 yards needed)
- Knitting Needles: US 11 (8.0 mm) knitting needles. You can use straight needles or a circular needle for this flat pattern.
- Cable Needle: A cable needle (any type will work) to hold stitches while you create the twists.
- Tapestry Needle: A large-eyed tapestry needle for weaving in ends and seaming the headband together.
- Scissors: For cutting yarn.
Gauge: 12 stitches and 16 rows = 4 inches in stockinette stitch. While gauge isn't critical for a headband, it's always good practice to check. The finished size is approximately 20 inches in circumference (unstretched) and 4.5 inches wide, stretching to fit most adult heads comfortably.
Step-by-Step Instructions
This pattern is a fantastic way to learn or practice cable knitting. Follow these detailed instructions carefully, and you'll have a beautiful headband in no time. Let's start with the abbreviations you'll need to know.
Abbreviations
- CO: Cast on
- K: Knit
- P: Purl
- C4F: Slip 2 stitches to cable needle, hold in front, knit next 2 stitches, then knit 2 stitches from cable needle
- C4B: Slip 2 stitches to cable needle, hold in back, knit next 2 stitches, then knit 2 stitches from cable needle
- K2tog: Knit 2 stitches together (decrease)
- SSK: Slip, slip, knit (slip 2 stitches knitwise one at a time, then knit them together through back loop - a left-leaning decrease)
- BO: Bind off
Getting Started: The Ribbed Edge
First, we'll create the foundation and the beautiful ribbed edges that frame the cable.
Step 1: CO 18 stitches using your preferred method (long-tail cast on works great).
Step 2: Work Rows 1-4 in K2, P2 ribbing across all stitches. This means: K2, P2, K2, P2, K2, P2, K2, P2, K2 (ending with K2). Repeat this row for a total of 4 rows. This creates a neat, rolled edge that gives the headband a polished look.
The Cable Pattern
Now for the fun part—the twisted cable! We'll work a 12-row repeat that creates the stunning braided center. Remember to keep your tension even, especially when working the cable rows.
Row 5 (Right Side): K2, P2, K10, P2, K2
Row 6 (Wrong Side): P2, K2, P10, K2, P2
Row 7: K2, P2, C4F, C4B, P2, K2. (This is the first cable twist row. The C4F creates a left-leaning twist, and the C4B creates a right-leaning twist, forming the rope-like braid.)
Row 8: P2, K2, P10, K2, P2
Row 9: K2, P2, K10, P2, K2
Row 10: P2, K2, P10, K2, P2
Row 11: K2, P2, C4B, C4F, P2, K2. (Notice the order is reversed on this row to create the alternating twist of the braid.)
Row 12: P2, K2, P10, K2, P2
Repeat Rows 5-12 until the headband measures approximately 18 inches from the cast-on edge. It's best to end with a Row 12 (a wrong side row) so that you're ready to work the shaping on the right side. Lay it flat to measure—it should be a long, flat rectangle.
Shaping the End
We'll now decrease the stitches to create a tapered end that will be sewn to the cast-on edge, making the headband less bulky at the seam.
Next row (Right Side): K2, P2, K2tog, SSK, K2tog, SSK, K2tog, P2, K2. (You should have 12 stitches remaining on your needle.)
Next row (Wrong Side): P2, K2, P4, K2, P2
Next row: K2, P2, K4, P2, K2
Next row: P2, K2, P4, K2, P2
Next step: BO all stitches in pattern (knit the knits and purl the purls as you bind off). Leave a long tail of yarn (about 12-15 inches) for seaming.
Assembly: Creating the Twist
This is the magical step that turns a flat rectangle into a beautiful, twisted headband.
Step 1: Lay the headband flat with the right side facing up. The cable pattern should be running horizontally.
Step 2: Pick up one end and give it a single twist so that the cable pattern forms a continuous spiral. The wrong side of one end should now be facing up, while the right side of the other end is facing up. This twist is what creates the iconic look.
Step 3: Using your tapestry needle and the long yarn tail, sew the cast-on edge to the bind-off edge. Use a whip stitch or mattress stitch, carefully matching the ribbing patterns on both ends so the seam blends in seamlessly. Weave in all ends securely with your tapestry needle to hide them.
Finishing Touches
Give your headband a gentle block if desired—simply wet it and lay it flat to dry to even out the stitches. And there you have it! A beautiful, handcrafted Aurora Alpine Cable Knit Headband.
Optional: For a unique touch, add a decorative button or a small leather patch at the seam for extra flair. This is a great way to personalize your headband and make it truly one-of-a-kind.
We hope you enjoyed this pattern! The cable technique is a rewarding skill to learn, and this headband is the perfect canvas to showcase it. Happy knitting!