Enchanted Blossom Trail Crochet Garland Free Pattern – Whimsical Flower Bunting
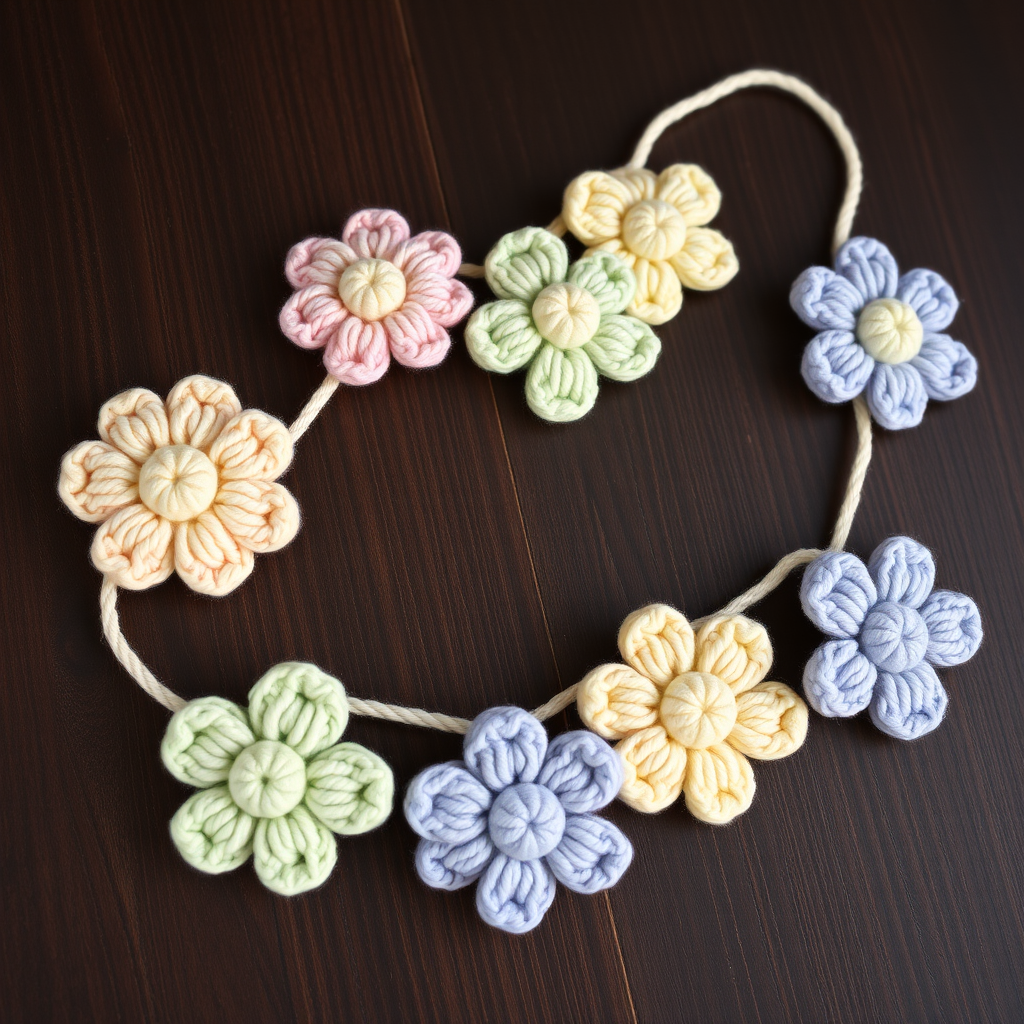
Enchanted Blossom Trail Crochet Garland: A Whimsical Flower Bunting Pattern
Imagine a delicate string of handcrafted blossoms, gently swaying in a soft breeze, bringing a touch of springtime magic to any room. The Enchanted Blossom Trail Crochet Garland is a dreamy, nature-inspired project that transforms simple pastel yarns into a charming bunting perfect for nurseries, weddings, cozy reading nooks, or festive spring celebrations. This free pattern is designed with beginners in mind, offering a relaxing and rewarding crochet experience that results in a beautiful, whimsical decoration you'll be proud to display.
With its soft hues of blush pink, butter yellow, sage green, sky blue, and lavender, each flower features a textured cream center, creating a romantic and airy aesthetic. Whether you're a seasoned crafter or picking up a hook for the first time, this step-by-step guide will walk you through every detail to create your own enchanting garland.
Materials Needed
Before you begin your crafting journey, gather the following supplies. The beauty of this project lies in its simplicity—you only need a few basic tools and yarns to create something truly magical.
- Yarn: Worsted weight cotton yarn in assorted pastel colors (e.g., blush pink, butter yellow, sage green, sky blue, lavender) and a contrasting cream for the centers.
- Crochet Hook: 3.5mm (E) crochet hook.
- Yarn Needle: For weaving in ends and sewing the flowers onto the garland string.
- Scissors: For cutting yarn.
- Optional: Wooden dowel or ribbon for hanging the finished garland.
Note on Gauge: Gauge is not critical for this project. The goal is to maintain a tight, neat stitch to help the flowers hold their shape beautifully. If your stitches are looser, simply adjust your tension as you go.
Step-by-Step Instructions
Follow these detailed instructions to create your Enchanted Blossom Trail. The pattern is broken down into three main parts: creating the flower motifs, making the centers, and assembling the garland. Take your time, enjoy the process, and soon you'll have a stunning bunting to cherish.
Part 1: Crochet the Flower Motif (Make 10-15, Varying Colors)
Each flower is worked in the round, starting from the center and building outward into a beautiful 12-petal blossom. Repeat this motif for each flower, switching up your pastel colors for a vibrant, whimsical mix.
Round 1: With your chosen pastel color, make a magic ring. Chain 3 (this counts as your first double crochet). Work 11 double crochet (dc) into the ring. Slip stitch to the top of the beginning chain-3 to join. You should now have 12 dc stitches total.
Round 2: Chain 1 (this does not count as a stitch). Work 2 single crochet (sc) into the same stitch. *Work 2 sc into the next dc.* Repeat from * to * around the circle. Slip stitch to the first sc to join. You will now have 24 sc stitches.
Round 3 (Creating the Petals): This round forms the delicate petals. Chain 4 (counts as your first treble crochet). Work 2 treble crochet (tr) into the same stitch. Chain 3. Slip stitch into the same stitch. This completes your first petal. *Slip stitch into the next sc. Chain 4. Work 2 tr into the next sc. Chain 3. Slip stitch into the same sc.* Repeat from * to * around the entire circle. You will create a total of 12 petals. Fasten off and weave in the yarn ends securely.
Part 2: Create the Flower Centers (Make One Per Flower)
The textured cream centers add a lovely contrast and a tactile, dimensional quality to each blossom. They are quick to make and attach.
With your cream yarn, make a magic ring. Chain 2 (this does not count as a stitch). Work 6 single crochet (sc) into the ring. Slip stitch to the first sc to join. Fasten off, leaving a long tail (about 15-20 cm) for sewing.
Attaching the Center: Thread the long tail onto your yarn needle. Place the small cream circle in the middle of a flower. Sew it in place by passing the needle through the center of the cream circle and into the flower's center, pulling gently. To create the textured puff effect, wrap the yarn tail around the center of the cream circle a few times, then secure it with a few small stitches on the back of the flower. Weave in the ends.
Part 3: Assembling the Garland
Once all your flowers are complete, it's time to string them together into a beautiful bunting. This is where your garland comes to life.
- Prepare the Base String: Cut a length of yarn or ribbon about 1.5 meters long (or your desired garland length). A simple cotton cord or a strand of cream yarn works perfectly.
- Arrange Your Flowers: Lay out your finished flowers on a flat surface in a pleasing arrangement. Vary the colors and space them about 10-15 cm apart. This spacing creates a delicate, airy look.
- Attach the Flowers: Thread a yarn needle with a length of matching yarn. To attach each flower, pass the needle through the back of the flower (near the center), then around the base string. Pull the yarn tight and secure it with a small, discreet knot on the back of the flower. Repeat this for each flower, ensuring they are evenly spaced.
- Hang and Enjoy: Once all flowers are securely attached, your Enchanted Blossom Trail is ready to display. Hang it using a wooden dowel, ribbon loops at each end, or directly on a wall with removable hooks. Step back and admire your handiwork!
Your Enchanted Blossom Trail Crochet Garland is now complete. This whimsical bunting is a wonderful way to add a personal, handmade touch to your home or a special event. The soft pastel colors and textured centers make it a truly enchanting piece that will be admired for years to come. Happy crocheting!


