Crochet Baby Sweater Patterns
Enchanted Forest Baby Sweater Free Pattern
Anonymous
•
July 18, 2026
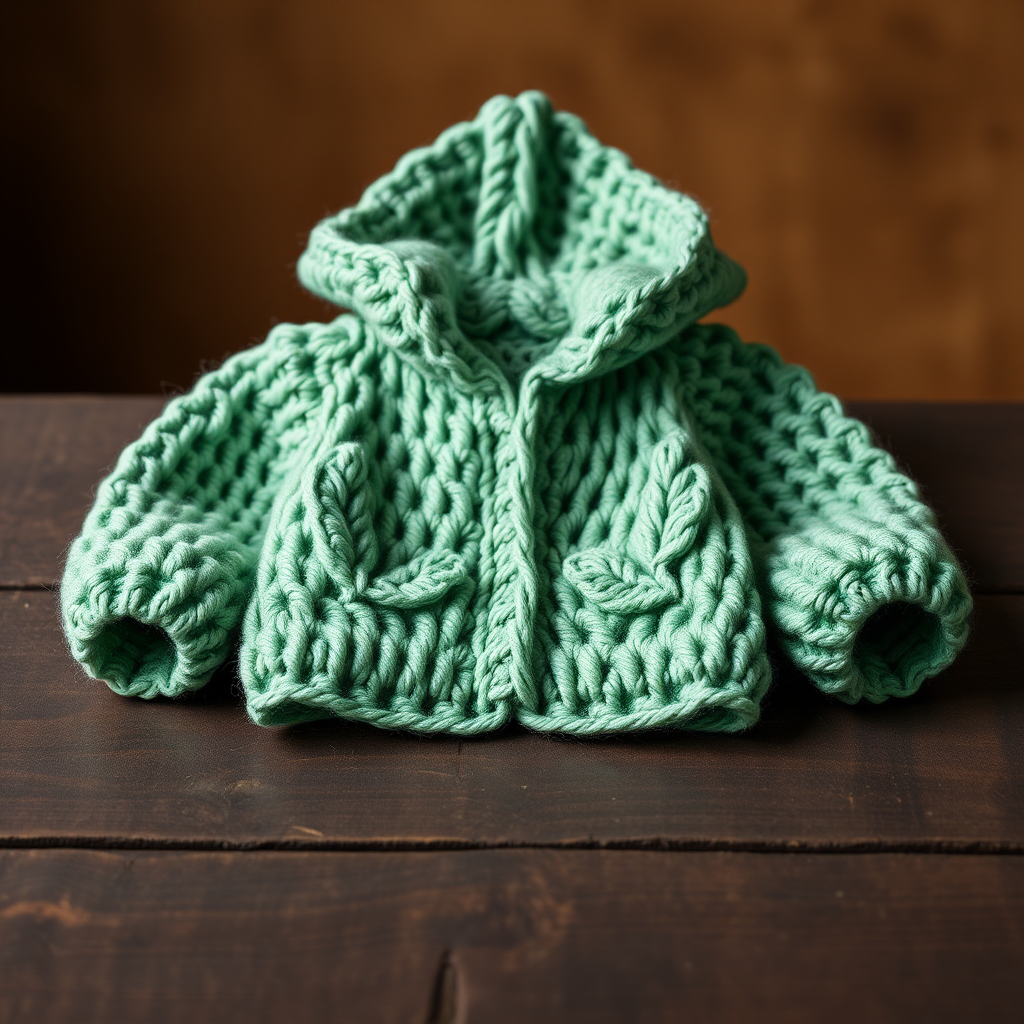
Enchanted Forest Baby Sweater Free Pattern
Introduction
Wrap your little one in the magic of the forest with this Enchanted Forest Baby Sweater. Featuring intricate leaf motifs and a cozy hood, this sweater is perfect for keeping babies warm and stylish. This pattern is designed for beginners, ensuring that you can create a beautiful piece for your little one with ease.
Materials Needed
- Yarn: DK weight, 100% merino wool
- Crochet Hook: 4.0 mm crochet hook
- Gauge: 16 stitches and 20 rows = 4 inches in double crochet
Step-by-Step Instructions
1. Back Panel
- Chain 50.
- Row 1: Double crochet (dc) in the 4th chain from the hook and in each chain across. You should have 48 dc.
- Rows 2-20: Chain 3 (this counts as your first dc), turn your work. Dc in each stitch across. Repeat this for a total of 19 rows.
2. Front Panels (Make 2)
- Chain 26.
- Row 1: Dc in the 4th chain from the hook and in each chain across. You should have 24 dc.
- Rows 2-20: Chain 3, turn your work. Dc in each stitch across. Repeat this for a total of 19 rows.
3. Sleeves (Make 2)
- Chain 30.
- Row 1: Dc in the 4th chain from the hook and in each chain across. You should have 28 dc.
- Rows 2-15: Chain 3, turn your work. Dc in each stitch across. Repeat this for a total of 14 rows.
4. Hood
- Chain 60.
- Row 1: Dc in the 4th chain from the hook and in each chain across. You should have 58 dc.
- Rows 2-10: Chain 3, turn your work. Dc in each stitch across. Repeat this for a total of 9 rows.
5. Leaf Motif (Make 5)
- Start with a magic ring, chain 3, and work 12 dc into the ring. Join with a slip stitch (sl st).
- Round 2: Chain 3, then in the same stitch, work *dc, chain 1, dc*. Repeat this around the ring and join.
6. Assembly
- Begin by sewing the shoulder seams of the back and front panels together.
- Attach the sleeves to the armholes by aligning the edges and sewing them together.
- Sew the side seams of the body and the sleeve seams together.
- Attach the hood to the neckline by sewing it securely in place.
- Finally, sew the leaf motifs onto the front panels, spacing them evenly for a whimsical touch.
7. Finishing
- Weave in all loose ends using a yarn needle to ensure a neat finish.
- Block your sweater to the desired measurements to enhance the shape and texture.
Now you have your very own Enchanted Forest Baby Sweater! This cozy piece will keep your little one warm and stylish, and you can take pride in creating it with your own hands. Happy crocheting!



