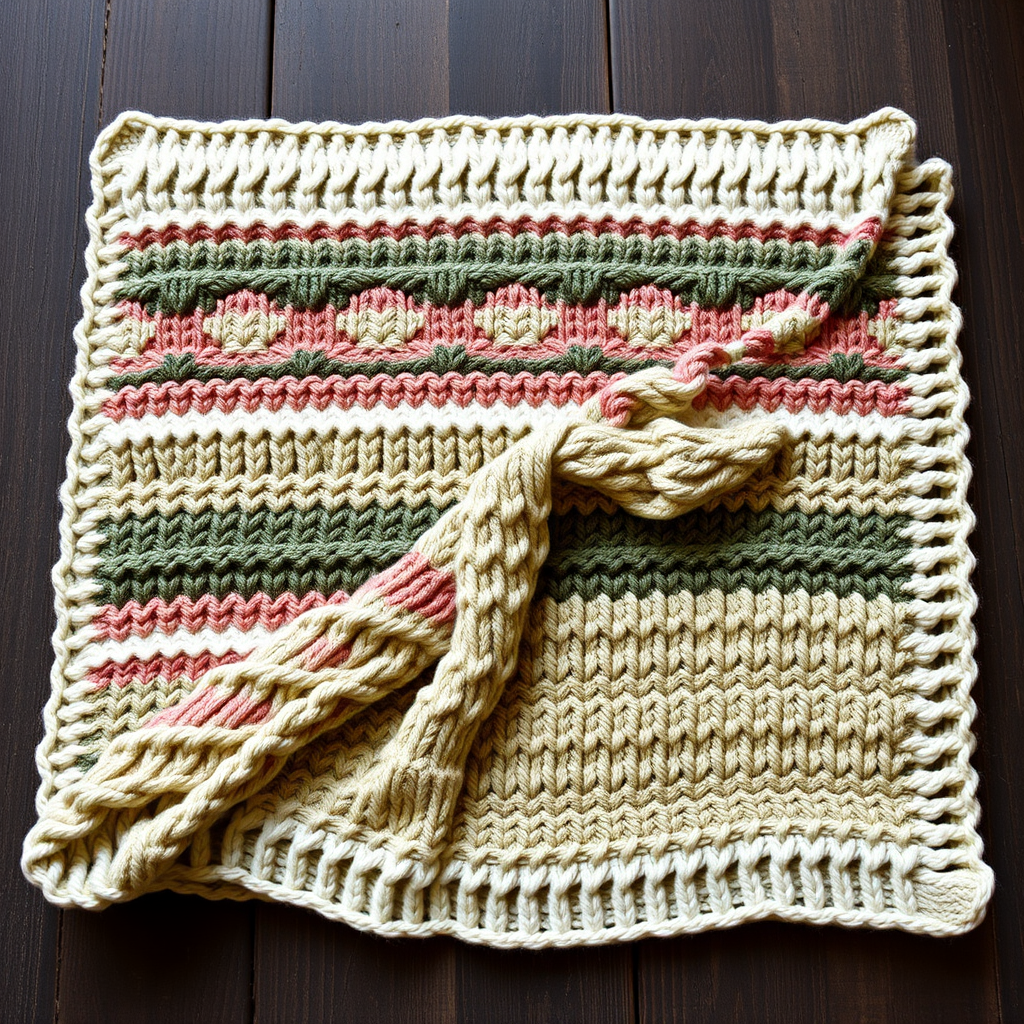
Enchanted Meadow Mosaic Throw Free Pattern – Textured Knit Blanket

Introducing the Enchanted Meadow Mosaic Throw
Wrap yourself in the serene beauty of a wildflower meadow with this richly textured knitted throw. The Enchanted Meadow Mosaic Throw features a stunning mosaic of bobbles, cables, and lace, creating an heirloom-quality piece that is a joy to knit and a cozy, artistic centerpiece for any room. This intermediate-level pattern guides you through four distinct vertical panels, each with its own unique texture, all framed by a wide garter stitch border in a harmonious meadow green. The result is a dimensional, earthy blanket that evokes a peaceful meadow at sunset.
Whether you're looking for a rewarding weekend project or a gift that will be treasured for years, this throw delivers both beauty and functionality. The pattern is written to be clear and comprehensive, ensuring a smooth knitting experience from cast-on to final block.
Materials Needed
Before you begin, gather the following materials. Having everything ready will make your knitting session seamless and enjoyable.
Yarn
Worsted weight yarn in 4 colors (approximately):
- Color A (Meadow Green): 1200 yards – used for borders and Panel 1
- Color B (Buttercup Yellow): 600 yards – used for Panel 2
- Color C (Dusty Rose): 600 yards – used for Panel 3
- Color D (Cream): 800 yards – used for Panel 4
Tip: Choose a soft, durable wool or wool-blend for best stitch definition and longevity.
Needles & Notions
- US 8 (5 mm) circular knitting needle, 32-inch or longer (to accommodate the large number of stitches)
- Cable needle (for cable panels)
- Stitch markers (optional, but helpful for tracking pattern repeats)
- Tapestry needle for weaving in ends
- Blocking mats and pins (for finishing)
Gauge
18 stitches and 24 rows = 4 inches in stockinette stitch. Always knit a gauge swatch to ensure your finished throw matches the intended dimensions. Adjust needle size if necessary to achieve gauge.
Step-by-Step Instructions
This pattern is worked flat in one piece from the bottom up. The throw is composed of 4 vertical panels, each with a different motif, separated by a simple seed stitch border. Follow each section carefully, and you'll create a stunning mosaic of textures.
Finished Size & Abbreviations
Finished Size: Approximately 50 inches wide x 60 inches long (adjustable by repeating pattern motifs).
Abbreviations:
- k = knit
- p = purl
- yo = yarn over
- k2tog = knit two together (right-leaning decrease)
- ssk = slip, slip, knit (left-leaning decrease)
- m1 = make one (increase)
- bobble = (k1, p1, k1, p1, k1) into same stitch, then pass the 2nd, 3rd, 4th, and 5th stitches over the 1st stitch
- c4b = cable 4 back (slip 2 stitches to cable needle, hold in back, k2, then k2 from cable needle)
- c4f = cable 4 front (slip 2 stitches to cable needle, hold in front, k2, then k2 from cable needle)
Pattern Notes
- Worked flat in one piece from bottom up.
- Each motif is a multiple of 12 stitches + 2 edge stitches.
- The throw is composed of 4 vertical panels, each with a different motif, separated by a simple seed stitch border.
Border (Worked First)
With Color A, cast on 226 stitches.
Knit 6 rows of garter stitch (all knit). This creates a sturdy, non-curling foundation for your throw.
Main Body Setup
Row 1 (RS): With Color A, k6 (border), *p2, k2, p2, k6* repeat from * to * until last 6 stitches, k6.
Row 2 (WS): With Color A, k6, *k2, p2, k2, p6* repeat from * to * until last 6 stitches, k6.
These two rows establish the seed stitch border pattern that will frame your panels. The 6 stitches at each edge remain in garter/seed stitch throughout the entire throw.
Panel 1: Meadow Bobbles (50 rows)
Continue with Color A. Work in stockinette stitch (knit on RS, purl on WS) across the main body, maintaining the 6-stitch seed stitch borders on each side.
Bobble Placement: On RS rows, every 6th stitch, work a bobble. Place bobbles in a staggered pattern on rows 5, 15, 25, 35, and 45.
Detailed Row Guide:
- Rows 1-4: Stockinette stitch (no bobbles)
- Row 5 (RS): Work across in stockinette, but at every 6th stitch, work a bobble. (Example: k5, bobble, k11, bobble, repeat to end)
- Rows 6-14: Stockinette stitch
- Row 15 (RS): Work across in stockinette, but offset the bobbles by 6 stitches. (Example: k11, bobble, k11, bobble, repeat to end)
- Rows 16-24: Stockinette stitch
- Row 25 (RS): Same as Row 5 (bobbles aligned with first row)
- Rows 26-34: Stockinette stitch
- Row 35 (RS): Same as Row 15 (offset bobbles)
- Rows 36-44: Stockinette stitch
- Row 45 (RS): Same as Row 5
- Rows 46-50: Stockinette stitch
Pro Tip: The staggered bobbles create a beautiful diamond pattern across the panel. Count your stitches regularly to ensure accuracy.
Panel 2: Sunlit Cables (50 rows)
Switch to Color B. Continue maintaining the 6-stitch seed stitch borders on each side.
Work in stockinette stitch, but on a 12-stitch repeat, work c4b and c4f every 8 rows to create a braided cable effect. Place cables in vertical columns separated by 2 purl stitches.
Detailed Row Guide:
- Row 1 (RS): Work in stockinette, but for each 12-stitch repeat, work: p2, c4b, c4f, p2. (This sets up the cable columns)
- Rows 2-8: Work in stockinette, purling the 2 stitches between cables on RS rows (knitting them on WS rows) to maintain the cable columns.
- Row 9 (RS): For each 12-stitch repeat, work: p2, c4f, c4b, p2. (This crosses the cables in the opposite direction)
- Rows 10-16: Work in stockinette, maintaining the purl columns.
- Row 17 (RS): Same as Row 1 (c4b, c4f)
- Rows 18-24: Stockinette with purl columns.
- Row 25 (RS): Same as Row 9 (c4f, c4b)
- Rows 26-32: Stockinette with purl columns.
- Row 33 (RS): Same as Row 1
- Rows 34-40: Stockinette with purl columns.
- Row 41 (RS): Same as Row 9
- Rows 42-50: Stockinette with purl columns.
Pro Tip: Use a cable needle to hold stitches. Always hold the cable needle to the back for c4b and to the front for c4f to ensure the cables twist correctly.
Panel 3: Rose Lace (50 rows)
Switch to Color C. Continue maintaining the 6-stitch seed stitch borders.
Work in a lace pattern to create an elegant leaf-and-eyelet motif.
Detailed Row Guide:
- Row 1 (RS): *k2tog, yo, k1, yo, ssk, k6* repeat from * to * across the panel.
- Row 2 (WS): Purl all stitches.
- Row 3 (RS): *k1, yo, k3, yo, k1, p2, k4* repeat from * to * across the panel. (Adjust the purl stitches to maintain the pattern alignment)
- Row 4 (WS): Purl all stitches.
- Rows 5-50: Repeat Rows 1-4, maintaining the pattern. The lace motif will naturally form a leaf-and-eyelet design.
Pro Tip: Place a stitch marker at the beginning of each pattern repeat to help you track your place. The yarn overs create the eyelets, so be careful not to drop them.
Panel 4: Cream Field (50 rows)
Switch to Color D. Continue maintaining the 6-stitch seed stitch borders.
Work in a simple seed stitch pattern across the main body:
- Row 1 (RS): *k1, p1* repeat from * to * across the panel.
- Row 2 (WS): *p1, k1* repeat from * to * across the panel. (This creates the seed stitch texture)
- Rows 3-50: Repeat Rows 1-2. This creates a textured, calming field that contrasts beautifully with the more intricate panels.
Pro Tip: The seed stitch is forgiving and meditative. Use this section to relax and enjoy the rhythm of your knitting.
Border (Worked at Top)
Switch back to Color A. Knit 6 rows of garter stitch (all knit).
Bind off loosely. Tip: Use a larger needle or a stretchy bind-off method to prevent the edge from pulling.
Finishing
Weave in all ends with a tapestry needle, being careful to secure them discreetly within the fabric.
Blocking: Block the throw to size. Pin out the lace and cable sections to open up the patterns and even out the stitches. Use a spray bottle or steam block (depending on your yarn's fiber content) and allow to dry completely.
Final Thoughts
Your Enchanted Meadow Mosaic Throw is now complete! This textured masterpiece will bring warmth and artistic charm to any space. The combination of bobbles, cables, lace, and seed stitch creates a tactile experience that invites you to snuggle up and unwind. Enjoy your handmade creation, and don't forget to share your beautiful work with fellow knitting enthusiasts!