Golden Hour Dune Wrap Free Pattern – Sunset-Inspired Textured Knit
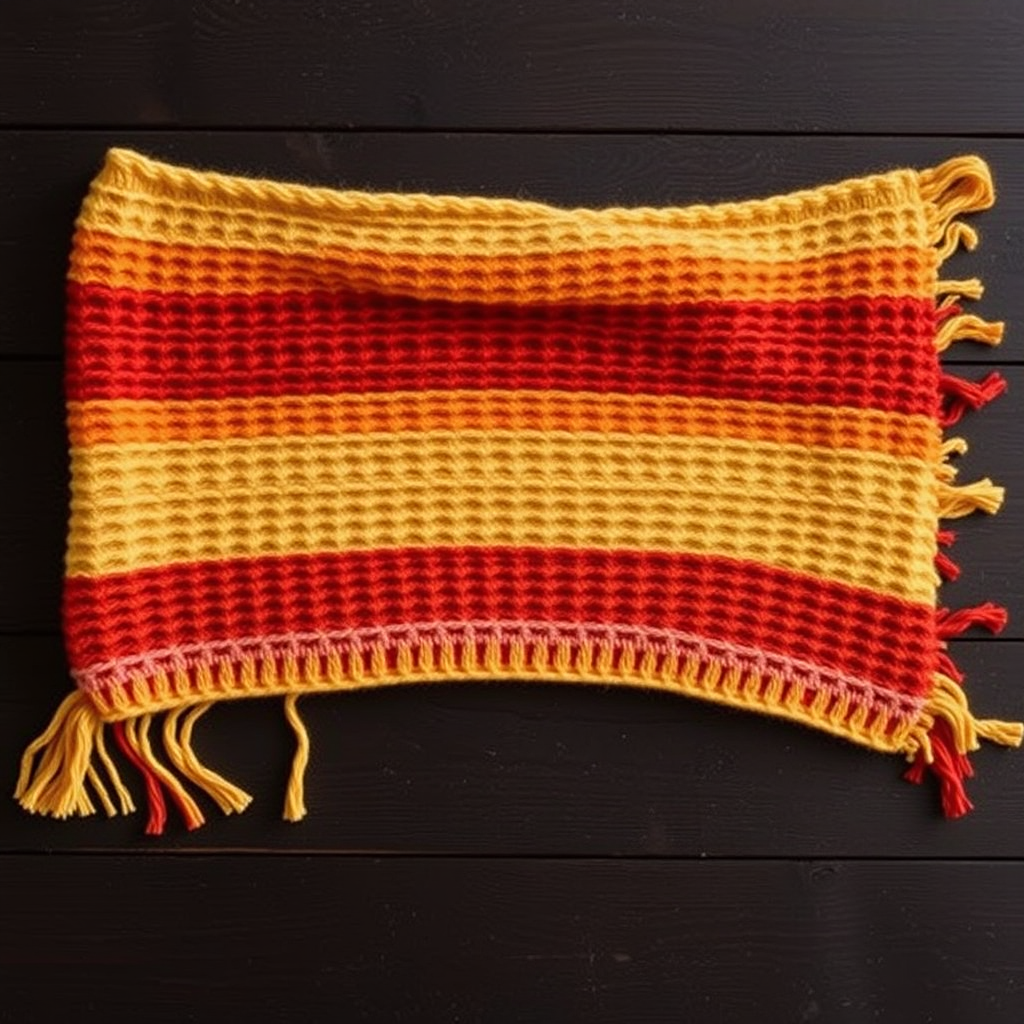
Golden Hour Dune Wrap Free Pattern – Sunset-Inspired Textured Knit
Wrap yourself in the warm hues of a coastal sunset with this richly textured knit wrap, featuring a unique ripple-and-dune stitch pattern. This cozy accessory transitions beautifully from beach bonfires to crisp autumn evenings. The Golden Hour Dune Wrap is a beginner-friendly project that uses simple knit and purl stitches, combined with strategic color changes, to create a stunning, undulating landscape of color and texture. Whether you're a seasoned knitter looking for a relaxing project or a beginner ready to tackle your first garment, this wrap is the perfect way to bring a little bit of sunset magic into your wardrobe.
Materials Needed
Before you begin, gather the following materials to ensure a smooth and enjoyable knitting experience. The quality of your yarn will greatly affect the final drape and feel of your wrap, so choose a soft, worsted weight yarn that you love.
- Yarn: Worsted weight yarn in 4 colors: A (Golden Yellow), B (Burnt Orange), C (Terracotta), D (Deep Coral) – approx. 350g total. A soft acrylic or wool blend works beautifully.
- Needles: US 8 (5mm) knitting needles. Straight needles are fine, but a circular needle (at least 32 inches long) can be more comfortable for holding the large number of stitches.
- Gauge: 18 stitches x 24 rows = 4 inches in stockinette stitch. Always take the time to check your gauge to ensure your finished wrap matches the intended dimensions.
- Extras: Tapestry needle for weaving in ends, scissors, and a row counter (optional but helpful).
Understanding the Pattern Stitch
This wrap is worked flat in one piece, using a simple repeat of knit and purl stitches to create a dune-like texture. The color changes mimic the layers of a sunset sky. The pattern stitch is a simple 8-row repeat that is easy to memorize and creates a beautiful, subtle ripple effect.
Abbreviations
- K = knit
- P = purl
- K2tog = knit two together (decrease)
- YO = yarn over (increase)
- RS = right side
- WS = wrong side
Pattern Stitch (Multiple of 6 + 2)
This is the core stitch pattern that creates the dune effect. The combination of YO and K2tog creates a subtle wave, while the purl stitches add texture and depth.
- Row 1 (RS): K2, *P2, K2, YO, K2tog, K2; repeat from * to end.
- Row 2 (WS): Purl all stitches.
- Row 3 (RS): K2, *P2, K2, YO, K2tog, K2; repeat from * to end.
- Row 4 (WS): Purl all stitches.
- Row 5 (RS): K2, *P2, K2, YO, K2tog, K2; repeat from * to end.
- Row 6 (WS): Purl all stitches.
- Row 7 (RS): K2, *P2, K2, YO, K2tog, K2; repeat from * to end.
- Row 8 (WS): Purl all stitches.
Note: The pattern stitch is identical on all RS rows. This makes it incredibly easy to memorize and allows you to relax into the rhythm of the knitting.
Step-by-Step Instructions
Follow these detailed instructions to create your Golden Hour Dune Wrap. The wrap is worked from the top down, starting with the golden yellow and ending with the deep coral.
Step 1: Casting On and First Color Block
With Color A (Golden Yellow), cast on 62 stitches. Use a long-tail cast-on for a neat, stretchy edge that will complement the bind-off edge. Ensure your cast-on is not too tight, as this will make the first row difficult to knit.
Once you have cast on, you will begin working the pattern stitch. Work in the pattern stitch for 20 rows (approx. 4 inches). Remember that Row 1 is a RS row. After completing Row 20, you will be on a WS row, ready to change colors.
Step 2: Transitioning to Burnt Orange
Now it's time to introduce the second color of your sunset. Switch to Color B (Burnt Orange). To do this seamlessly, simply start knitting the next row with the new yarn, leaving a tail of about 6 inches to weave in later. Do not cut Color A yet, as you may want to use it for the fringe.
Continue in the pattern stitch for 30 rows (approx. 6 inches) with Color B. Keep your tension consistent as you switch colors to avoid any puckering or loose stitches at the color change.
Step 3: Adding the Terracotta Layer
Your wrap is starting to take shape, mimicking the layers of a sunset. Switch to Color C (Terracotta). Again, leave a 6-inch tail to weave in later.
Continue in the pattern stitch for 30 rows (approx. 6 inches) with Color C. This is the middle section of your wrap, and the terracotta will provide a beautiful, earthy transition between the brighter orange and the deeper coral.
Step 4: Finishing with Deep Coral
We've reached the final color block, representing the deepest part of the sunset near the horizon. Switch to Color D (Deep Coral).
Continue in the pattern stitch for 20 rows (approx. 4 inches) with Color D. This will complete the main body of the wrap.
Step 5: Binding Off
After completing the final row of Color D, you are ready to bind off. Bind off loosely in pattern. This is crucial to maintain the stretchy, drapey edge of the wrap. To bind off in pattern, you will knit the knit stitches and purl the purl stitches as they appear, while also working the YO and K2tog as they come. For example, if your next stitch is a purl, purl it, then pass the previous stitch over. If it's a knit, knit it, then pass the previous stitch over. This will create a flexible edge that won't pull or distort the pattern.
Step 6: Weaving in Ends
This is the final, essential step to ensure your wrap is durable and looks professional. Weave in all ends using a tapestry needle. Thread the needle with the yarn tail and weave it in and out of the purl bumps on the wrong side of the work, following the path of the yarn. Weave in at least 2-3 inches of yarn to secure it firmly, then trim the excess. Be careful not to pull too tightly, as this can cause the fabric to pucker.
Step 7: Adding the Boho Fringe (Optional)
For a truly bohemian finish, add a simple fringe along the short edges. Cut strands of yarn from all four colors, each about 12 inches long. For a fuller fringe, use 3-4 strands per tassel. Fold the group of strands in half. Insert a crochet hook from the wrong side to the right side of the wrap at the edge. Pull the folded loop of the yarn group through the edge stitch. Then, pull the loose ends of the yarn through the loop and tighten gently. Repeat this process along both short edges, spacing the tassels about 1 inch apart. Trim the ends of the fringe to make them even.
Your Golden Hour Dune Wrap is now complete! Lay it flat to block it if desired, which will help even out the stitches and enhance the drape. This wrap is a beautiful, versatile piece that you'll reach for again and again, whether you're heading to the beach or curling up by the fire.


