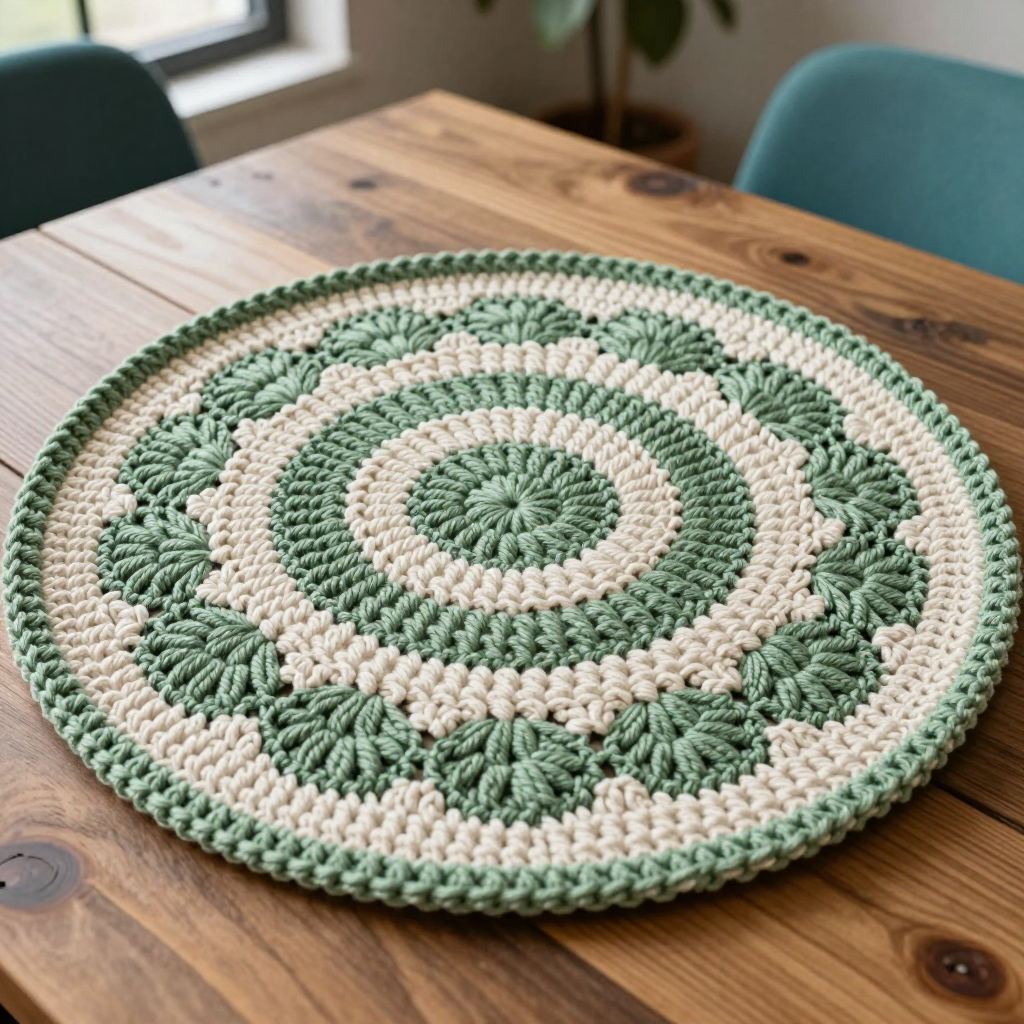
Mossy Rocks Mug Rug Duo: Free Crochet Pattern for Textured Circular Coasters

Mossy Rocks Mug Rug Duo: Free Crochet Pattern for Textured Circular Coasters
Introduction
If you have never held a crochet hook before, this is the perfect very first project to make with your own two hands. The Mossy Rocks Mug Rug Duo is a pair of small, round coasters worked in simple single crochet, so you only need to learn one stitch to finish the whole thing. Each mug rug is about 4.5 inches across, thick and slightly ridged, and feels dense and sturdy under a hot mug of tea or coffee. The concentric rings of deep forest green and warm rust look like mossy stones on a beach, giving your table that cozy "coastal grandmother" charm. Best of all, you can finish one in under an hour, which makes it a wonderfully encouraging first taste of crochet.
Materials Needed
- Yarn: Worsted weight (category 4) cotton yarn. You need approximately 30 yards of forest green and 30 yards of rust total, which is enough for both mug rugs. Cotton is recommended because it is absorbent, washable, and holds its shape.
- Crochet hook: Size I/9 (5.5 mm).
- Stitch marker: 1 (a small safety pin or a scrap of contrasting yarn works too).
- Tapestry needle: A blunt-tipped needle with a large eye, for weaving in yarn ends.
- Scissors: Any sharp pair for cutting yarn.
- Finished size: Each mug rug measures approximately 4.5 inches in diameter.
Abbreviations and Beginner Glossary
Every abbreviation used in this pattern is listed below and explained in plain English. You do not need to know anything before you start.
- ch – chain: Make a slip knot on your hook, then wrap the yarn over the hook and pull it through the loop on your hook. That is one chain. (Not used in this pattern, but you will see it in other patterns.)
- sc – single crochet: Insert your hook into the stitch, wrap the yarn over the hook, pull up a loop (you now have 2 loops on the hook), wrap the yarn over again, and pull it through both loops. One single crochet made.
- sl st – slip stitch: Insert your hook into the stitch, wrap the yarn over the hook, and pull it through both the stitch and the loop on your hook in one motion. It creates a flat, firm edge.
- st / sts – stitch / stitches: One completed stitch, or several.
- 2 sc in next st – work two single crochets into the same stitch. This is an increase, and it makes the circle grow wider.
- [ ] – brackets: Everything inside the brackets is repeated the number of times stated after the bracket.
- around – work all the way around the circle until you reach the stitch marker.
- magic ring – an adjustable loop: wrap the yarn around your fingers to form a loop, insert the hook into the loop, pull up a loop of yarn, chain 1 to secure, then work your stitches into the ring. Pull the short tail to close the hole tightly.
- fasten off – cut the yarn leaving a 6-inch tail, then pull the tail all the way through the last loop on your hook to lock it.
- weave in ends – thread a yarn tail onto the tapestry needle and sew it back and forth through the back of the fabric so it disappears.
Gauge
Gauge: 4 rounds = 2 inches in diameter; 8 sc = 2 inches.
Gauge simply means how big your stitches turn out. It matters because if your stitches are looser or tighter than the pattern expects, your mug rug will come out larger or smaller than 4.5 inches. To check your gauge, crochet the first 4 rounds of Mug Rug 1 exactly as written, then lay it flat and measure straight across the circle. It should measure about 2 inches. If it is bigger, try a smaller hook; if it is smaller, try a larger hook. Because this is a small coaster, a tiny difference will not ruin it, but checking first saves you surprises.
Beginner Tips Before You Start
- Use a stitch marker. Place it in the very first stitch of each round. Because you work in a spiral (continuous rounds), the beginning of the round is easy to lose track of, and the marker shows you exactly where each round starts and ends.
- Do not pull the yarn too tight. Keep an even, relaxed tension. If you yank the yarn after every stitch, the fabric becomes stiff and hard to work into on the next round.
- Count your stitches at the end of every round. The number in parentheses tells you exactly how many stitches you should have. If you are off, fix it before moving on.
- Change colors on the last stitch of the round. When the final stitch of a round is almost done (2 loops still on the hook), drop the old color and pull the new color through those last loops. This gives a clean color change.
- Keep the magic ring tail handy. After Round 1, pull the short tail firmly to close the center hole so no light shows through.
Step-by-Step Instructions
Notes: Both mug rugs are worked in continuous rounds (a spiral). Do not join at the end of each round unless the pattern says so. Place your stitch marker in the first stitch of every round. Change colors as described in the tips above.
Mug Rug 1 (Forest Green Center)
With forest green, make a magic ring.
Round 1: Work 8 sc into the magic ring. Pull the ring closed. (8 sc)
Round 2: 2 sc in each st around. (16 sc)
Round 3: [2 sc in next st, 1 sc in next st] around. (24 sc)
Round 4: [2 sc in next st, 1 sc in next 2 sts] around. (32 sc)
Round 5: [2 sc in next st, 1 sc in next 3 sts] around. (40 sc)
Change to rust.
Round 6: Sc in each st around. (40 sc)
Round 7: [2 sc in next st, 1 sc in next 4 sts] around. (48 sc)
Round 8: Sc in each st around. (48 sc)
Change to forest green.
Round 9: Sc in each st around. (48 sc)
Round 10: Sl st in each st around. Fasten off, leaving a 6-inch tail. Weave in ends.
Mug Rug 2 (Rust Center)
With rust, make a magic ring.
Round 1: Work 8 sc into the magic ring. Pull the ring closed. (8 sc)
Round 2: 2 sc in each st around. (16 sc)
Round 3: [2 sc in next st, 1 sc in next st] around. (24 sc)
Round 4: [2 sc in next st, 1 sc in next 2 sts] around. (32 sc)
Round 5: [2 sc in next st, 1 sc in next 3 sts] around. (40 sc)
Change to forest green.
Round 6: Sc in each st around. (40 sc)
Round 7: [2 sc in next st, 1 sc in next 4 sts] around. (48 sc)
Round 8: Sc in each st around. (48 sc)
Change to rust.
Round 9: Sc in each st around. (48 sc)
Round 10: Sl st in each st around. Fasten off, leaving a 6-inch tail. Weave in ends.
Assembly and Finishing
There is no seaming in this project, because each mug rug is worked as one continuous piece. Finishing is quick and makes your work look professional.
- Weave in the ends: Thread each 6-inch tail onto the tapestry needle. Turn the mug rug to the wrong side (the back). Sew the tail back and forth through the backs of several stitches, changing direction once, then trim the yarn close to the fabric. Do this for every tail, including the magic ring tail.
- Block lightly (optional): Dampen the mug rug with a light mist of water, lay it flat on a towel, and gently pat it into a perfect circle with your fingers. Let it dry completely. This helps the edges lie flat and even.
- Check the edge: Gently tug the slip stitch border so it sits flat and firm. Trim any stray yarn fuzz with your scissors.
Pro Tips and Variations
- Play with color: Swap the forest green and rust for any two colors you love, such as cream and sage, or navy and mustard. Keep one color for the center and the other for the middle band, then reverse them on the second mug rug for a matching pair.
- Make them bigger: To make a larger trivet, keep increasing in the same pattern: each new round adds 8 stitches (Round 11 would be [2 sc in next st, 1 sc in next 5 sts] around for 56 sts). Add plain sc rounds between increases as desired.
- Try a different yarn: Cotton is ideal, but a cotton-blend or a smooth acrylic worsted weight also works. Just check your gauge again, since different fibers behave differently.
- Add a hanging loop: After Round 10, chain 8 and slip stitch back into the same stitch to create a small loop, then fasten off. Hang your mug rug on a hook when not in use.