Oceanic Opulence Crochet Cowl Free Pattern
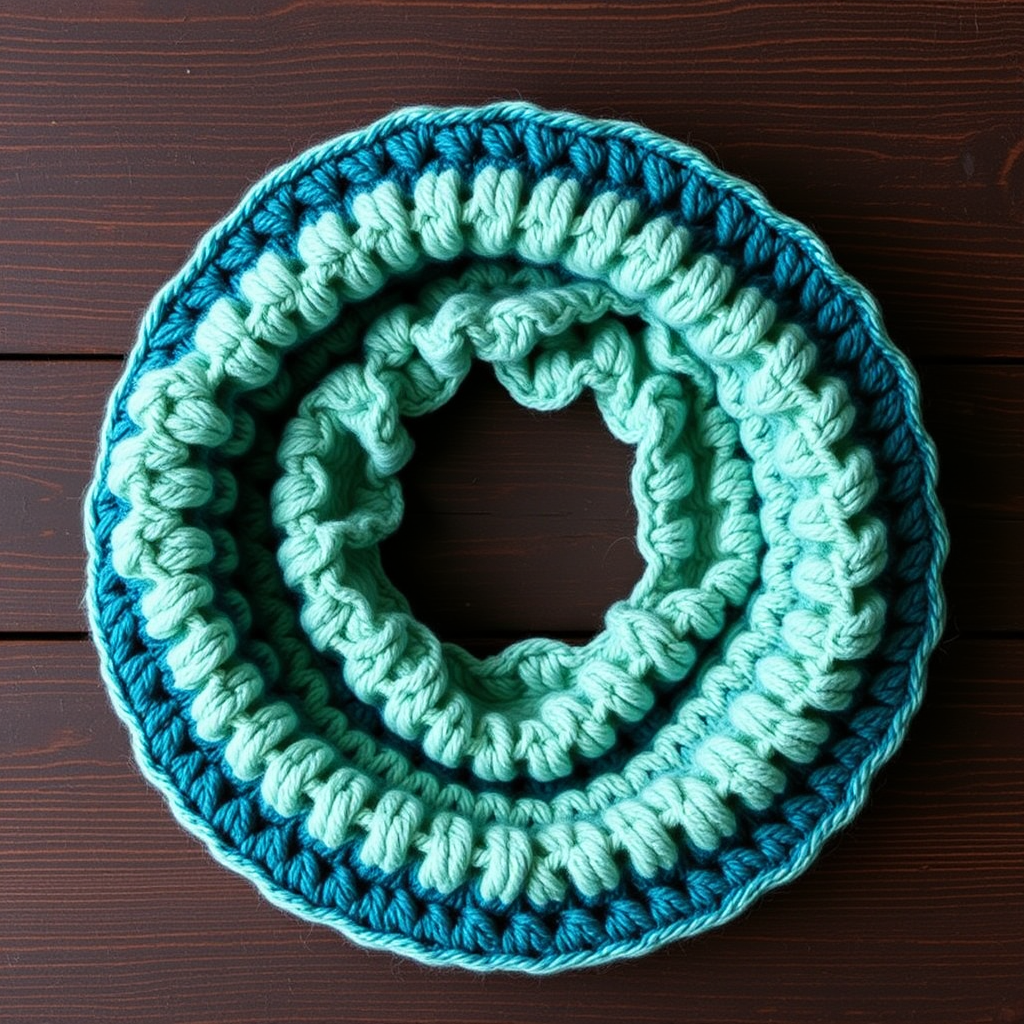
Dive Into the Deep: The Oceanic Opulence Crochet Cowl
Imagine wrapping yourself in the shimmering, textured scales of a mermaid's tail. That's the magic of the Oceanic Opulence Crochet Cowl. This luxurious, wearable piece of art uses a clever combination of shell stitches and a gradient color palette to create a stunning, ocean-inspired accessory. Whether you're a seasoned crocheter looking for a new textured project or a confident beginner ready for a challenge, this free pattern is your ticket to creating a truly breathtaking cowl. The dense, tactile fabric is not only cozy but also a fantastic statement piece that drapes elegantly around the neck, adding a touch of handmade opulence to any outfit.
Materials Needed
Before you begin your deep-sea crochet adventure, gather these simple materials. The project is designed to be portable and easy to work on, requiring just a few essentials.
- Yarn: Worsted weight (4) yarn in two colors. You will need approximately 250 yards of each.
- Color A (e.g., Deep Teal): For the base and top bands.
- Color B (e.g., Seafoam Green): For the middle bands.
- Crochet Hook: Size L/11 (8 mm) crochet hook. This larger hook helps create a soft, drapey fabric.
- Other Tools: A yarn needle for weaving in ends and a pair of scissors.
Gauge & Finished Size
- Gauge: 12 stitches and 8 rows = 4 inches in shell stitch pattern (after blocking). Blocking is crucial to open up the stitches and achieve the correct drape.
- Finished Size: Approximately 28 inches around and 10 inches tall. This size is easily adjustable by changing the number of chains in the foundation row.
Step-by-Step Instructions
This pattern is worked in the round to create a seamless tube. Don't be intimidated by the special stitches; they are simple variations of the double crochet. Let's break it down.
Special Stitches
- Shell (sh): Work 5 double crochet (dc) in the same stitch. This creates the "scale" effect.
- V-stitch (v-st): (dc, ch 1, dc) in the same stitch. This creates the open, breathable gaps.
Getting Started: The Foundation
Foundation Row: With Color A, chain 66. Carefully join with a slip stitch to form a ring, being absolutely sure not to twist your chain. This is the most common mistake, so take your time to ensure the chain lies flat before joining.
Round 1: Establishing the Pattern
Ch 3 (this counts as your first dc). Work 1 dc in each of the next 2 chains. Now, you will begin the repeating pattern:
- *Skip 2 chains, work a sh (5 dc) in the next chain.
- Skip 2 chains, work a v-st (dc, ch 1, dc) in the next chain.
Repeat from * around. To close the round, skip 2 chains, work a sh in the last chain, then skip 2 chains and work a v-st in the same chain as the beginning ch-3. Join with a slip stitch to the top of the beginning ch-3. You should now have 11 shells and 11 v-sts.
Round 2: Building the Scales
This is where the magic happens. You will now be working into the previous round's stitches.
- Ch 3 (counts as first dc). Work 2 dc in the same stitch. This is the first half of a shell.
- *Skip to the next v-st. Work a full sh (5 dc) in the ch-1 space of that v-st.
- Skip to the next shell. Work a v-st in the center dc of the shell (which is the 3rd dc of the 5-dc group).
Repeat from * around. To finish, work 2 more dc in the same stitch as the beginning (this completes the first shell). Join with a slip stitch to the top of the beginning ch-3.
Rounds 3-5: Continuing the Rhythm
You will now repeat Round 2 for the next several rounds. This creates the repeating scale pattern.
- Round 3: Ch 3 (counts as first dc), work 2 dc in the same stitch (first half of shell). *Skip to the next v-st, work a full sh in the ch-1 space, skip to the next shell, work a v-st in the center dc of the shell; repeat from * around, ending with 2 more dc in the same stitch as the beginning. Join with a slip stitch.
- Rounds 4-5: Repeat Round 3.
Color Changes & Height
Now, you'll introduce Color B to create the beautiful ocean gradient. Simply fasten off Color A and join Color B with a slip stitch at the beginning of the round.
- Round 6: With Color B, repeat Round 3.
- Rounds 7-8: With Color B, repeat Round 3.
- Rounds 9-10: With Color A, repeat Round 3.
- Rounds 11-12: With Color A, repeat Round 3.
- Rounds 13-14: With Color B, repeat Round 3.
- Rounds 15-16: With Color B, repeat Round 3.
- Rounds 17-18: With Color A, repeat Round 3.
- Rounds 19-20: With Color A, repeat Round 3.
Edging & Finishing Touches
To give your cowl a clean, polished edge, we'll add a simple single crochet border.
- Edging: With Color A, ch 1. Work 1 single crochet (sc) in each stitch around, working 1 sc in each dc and 1 sc in each ch-1 space. Join with a slip stitch to the first sc. Fasten off and weave in all ends securely.
Blocking: The Final Step
Blocking is essential for this pattern. It opens up the shell stitches, evens out the edges, and gives the cowl its beautiful drape. Gently wet the cowl, squeeze out excess water (do not wring), and lay it flat on a towel. Shape it to the desired dimensions and allow it to dry completely. Once dry, your Oceanic Opulence Cowl is ready to wear!
This pattern is a joy to work up, and the result is a truly stunning, one-of-a-kind accessory. The combination of texture and color makes it a perfect gift or a special treat for yourself. Happy crocheting!


