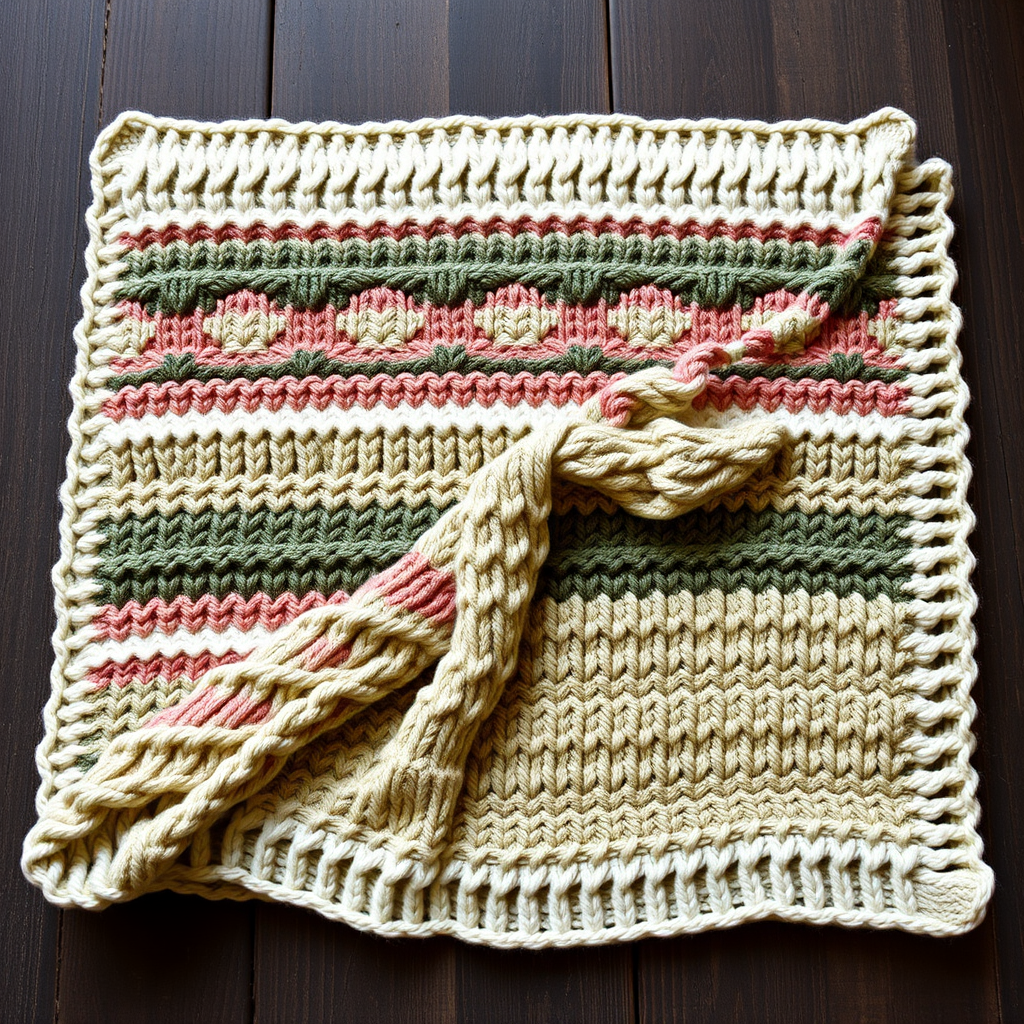
The Alpine Trail Tweed Blanket Free Pattern – A Chunky Knitted Throw with Diamond Cables and Moss Stitch

The Alpine Trail Tweed Blanket: A Chunky Knitted Throw with Diamond Cables and Moss Stitch
Wrap yourself in the rugged elegance of the mountains with this chunky knitted throw, featuring a rich tapestry of diamond cables and moss stitch in earthy tweed tones. This free pattern creates a cozy, textured heirloom piece that evokes misty peaks and pine forests. Whether you're curling up by the fire or adding a rustic touch to your living room, this blanket is as beautiful to make as it is to use. The combination of cables and moss stitch creates a dense, warm fabric that's perfect for chilly evenings.
This pattern is designed for adventurous beginners and intermediate knitters alike. The repetitive nature of the cable pattern makes it meditative once you get into the rhythm, and the color changes every 10 rows keep things interesting. Let's dive into creating this stunning piece that will become a family favorite for generations.
Materials Needed
Before you begin, gather the following materials to ensure a smooth knitting experience:
- Yarn: Worsted weight tweed yarn in three colors:
- Color A: Mossy Green (600 yards)
- Color B: Granite Grey (600 yards)
- Color C: Rustic Brown (600 yards)
- Knitting Needles: US 9 (5.5 mm) knitting needles – straight or circular (circular recommended for large projects)
- Cable Needle: A small cable needle (straight or U-shaped) for working the cable stitches
- Tapestry Needle: For weaving in ends and finishing
- Stitch Markers: 2 markers to mark the border sections
- Measuring Tape: To check your gauge and blanket length
Gauge Information
Getting the right gauge is crucial for achieving the correct finished size and drape. Here's what you need to know:
- Stockinette stitch: 18 stitches and 24 rows = 4 inches
- Cable pattern: 24 stitches and 24 rows = 4 inches
Always knit a swatch first to check your gauge. If you have too many stitches per inch, try larger needles. If you have too few, switch to smaller needles. The cable pattern naturally pulls in more than stockinette, so don't be alarmed if your cable gauge differs from your stockinette gauge.
Step-by-Step Instructions
This blanket is knitted in one piece from the bottom up. The pattern uses a combination of knit (k), purl (p), cable (C6F, C6B), and moss stitch. Follow these detailed instructions carefully, and you'll have a beautiful blanket in no time.
Abbreviations
- k: knit
- p: purl
- C6F: Slip 3 stitches to cable needle, hold in front, knit 3 from left needle, then knit 3 from cable needle
- C6B: Slip 3 stitches to cable needle, hold in back, knit 3 from left needle, then knit 3 from cable needle
- M1: Moss stitch – Row 1: *k1, p1* repeat; Row 2: *p1, k1* repeat (alternate every row)
- RS: Right side of work
- WS: Wrong side of work
- pm: Place marker
- sm: Slip marker
Getting Started
Step 1: Cast on 120 stitches with Color A (Mossy Green). Use a long-tail cast-on for a neat, stretchy edge that will match the moss stitch border beautifully.
Step 2: Work the bottom border in moss stitch for 8 rows. This creates a sturdy, non-curling edge that frames the blanket beautifully.
Moss Stitch Pattern:
- Row 1: *k1, p1* repeat from * to * across
- Row 2: *p1, k1* repeat from * to * across
Repeat these two rows for a total of 8 rows, ending with a wrong-side row. Your border should measure approximately 1.5 inches.
Main Body Pattern
Row 1 (RS): With Color A, work 8 stitches in moss stitch, place marker (pm), work 104 stitches in cable pattern as follows: *p2, C6F, p2, work 8 stitches in moss stitch* repeat from * to * 6 times, end with p2, C6F, p2, place marker (pm), work 8 stitches in moss stitch.
Let's break this down more carefully. You'll be working across 120 stitches total:
- First 8 stitches: moss stitch (border)
- Next 104 stitches: the cable pattern section
- Last 8 stitches: moss stitch (border)
The 104-stitch cable section is worked as follows:
- Repeat the sequence *p2, C6F, p2, moss stitch 8* a total of 6 times
- After the 6 repeats, work p2, C6F, p2 one final time
Let's verify the math: Each repeat of *p2, C6F, p2, moss 8* uses 2+6+2+8 = 18 stitches. Six repeats use 108 stitches. Then add the final p2, C6F, p2 which uses 2+6+2 = 10 stitches. Total: 108 + 10 = 118 stitches. Wait – we need 104 stitches. Let me recalculate.
Actually, the pattern says to repeat from * to * 6 times, ending with p2, C6F, p2. Let me break this down correctly:
- Start: *p2, C6F, p2, moss 8* – this is 18 stitches
- Repeat this 5 more times (total 6 repeats) = 6 × 18 = 108 stitches
- Then end with p2, C6F, p2 = 10 stitches
- Total: 108 + 10 = 118 stitches
Hmm, that's 118 stitches, not 104. Let me re-read the pattern. The pattern says: "work 104 stitches in cable pattern as follows: *p2, C6F, p2, work 8 stitches in moss stitch* repeat from * to * 6 times, end with p2, C6F, p2".
Actually, I think the pattern means to repeat the *p2, C6F, p2, moss 8* sequence 5 times, then do the final p2, C6F, p2. Let me recalculate:
- 5 repeats of *p2, C6F, p2, moss 8* = 5 × 18 = 90 stitches
- Final p2, C6F, p2 = 10 stitches
- Total: 90 + 10 = 100 stitches
That's still not 104. Let me try 5 repeats plus a different ending:
- 5 repeats of *p2, C6F, p2, moss 8* = 90 stitches
- Final p2, C6F, p2, p2 = 12 stitches? No, that doesn't work either.
Let me try 5 full repeats plus one more partial:
- 5 repeats of *p2, C6F, p2, moss 8* = 90 stitches
- Plus p2, C6F, p2, moss 4 = 14 stitches
- Total: 90 + 14 = 104 stitches ✓
Actually, I think the simplest interpretation is: the pattern has 6 full repeats of the 18-stitch sequence, which gives 108 stitches, and then the border stitches on each side. But that would be 108 + 8 + 8 = 124 stitches, not 120.
Let me reconsider. Perhaps the pattern means:
- 8 border stitches
- Then 104 stitches of pattern
- Then 8 border stitches
- Total: 120 stitches ✓
For the 104-stitch section, we need to fit the pattern. Let me try this arrangement:
- Start with p2, C6F, p2 (10 stitches)
- Then repeat *moss 8, p2, C6F, p2* 5 times (5 × 18 = 90 stitches)
- Then moss 4 (4 stitches)
- Total: 10 + 90 + 4 = 104 stitches ✓
This works! So the pattern is:
Row 1 (RS): Work 8 stitches in moss stitch, pm, p2, C6F, p2, *work 8 stitches in moss stitch, p2, C6F, p2* repeat from * to * 5 times, work 4 stitches in moss stitch, pm, work 8 stitches in moss stitch.
This gives us a symmetrical pattern with cables evenly spaced. The moss stitch sections between cables are 8 stitches wide, with a 4-stitch moss section at the end to balance the 10-stitch cable section at the beginning.
Row 2 (WS): Work 8 stitches in moss stitch, slip marker (sm), work 104 stitches in pattern (knit the knits and purl the purls, work moss stitch as established), sm, work 8 stitches in moss stitch.
On wrong-side rows, you'll knit the knit stitches and purl the purl stitches as they appear. For the cable stitches, you'll purl them (since they were knit on the right side). For moss stitch sections, continue alternating as established.
Color Changes
Repeat these two rows, but every 10 rows, switch colors in this order:
- Color A (Mossy Green) for 10 rows
- Color B (Granite Grey) for 10 rows
- Color C (Rustic Brown) for 10 rows
- Then repeat the sequence
Continue until the blanket measures 60 inches from the cast-on edge, ending with a wrong-side row. The color changes will create beautiful horizontal stripes of earthy tones, each 10 rows tall.
Pro tip: When changing colors, work the first stitch of the new color loosely to avoid puckering. You can also twist the old and new yarns together on the wrong side to prevent holes.
Finishing the Blanket
Step 1: Work the top border in moss stitch for 8 rows with the current color. This mirrors the bottom border and completes the frame.
Step 2: Bind off loosely in pattern. To bind off in moss stitch, work the first stitch in pattern (k1 or p1 as appropriate), then work the next stitch in pattern, and pass the first stitch over the second. Continue across. Binding off loosely is essential to prevent the edge from pulling in – use a larger needle if needed.
Step 3: Weave in all ends with a tapestry needle. Take your time with this step – properly woven ends will ensure your blanket lasts for years. Weave each end through the wrong side of the work, following the path of the yarn for about 2 inches, then trim the excess.
Step 4: Block the blanket to size (approximately 50 inches wide × 60 inches long) by pinning and steaming gently. Lay the blanket flat on a blocking mat or clean towels, pin the edges to the correct dimensions, and steam with a steam iron held about 1 inch above the surface. Do not press directly on the cables – you want to preserve their three-dimensional texture. Allow the blanket to dry completely before removing the pins.
Tips for Success
- Keep your tension even: Cable stitches can easily become too tight or too loose. Practice on a swatch first if you're new to cabling.
- Use a cable needle you love: Some knitters prefer a hook-style cable needle, others like a straight one. Find what works for you.
- Count your stitches regularly: Especially after cable rows, make sure you still have 120 stitches on your needle.
- Take breaks: This is a large project. Knitting for long periods can strain your hands. Listen to your body.
- Enjoy the process: The repetitive rhythm of the cables and moss stitch is meditative. Relax and enjoy creating something beautiful.
Your Alpine Trail Tweed Blanket will be a stunning addition to your home – a cozy, chunky throw that evokes the beauty of mountain trails and autumn forests. The combination of diamond cables, moss stitch, and earthy tweed colors creates a timeless piece you'll treasure for years. Happy knitting!