The Woven Ripple Pillow Cover: A Free Knitting Pattern for a Textured, Modern Throw Pillow
Introduction: A Modern Twist on Texture
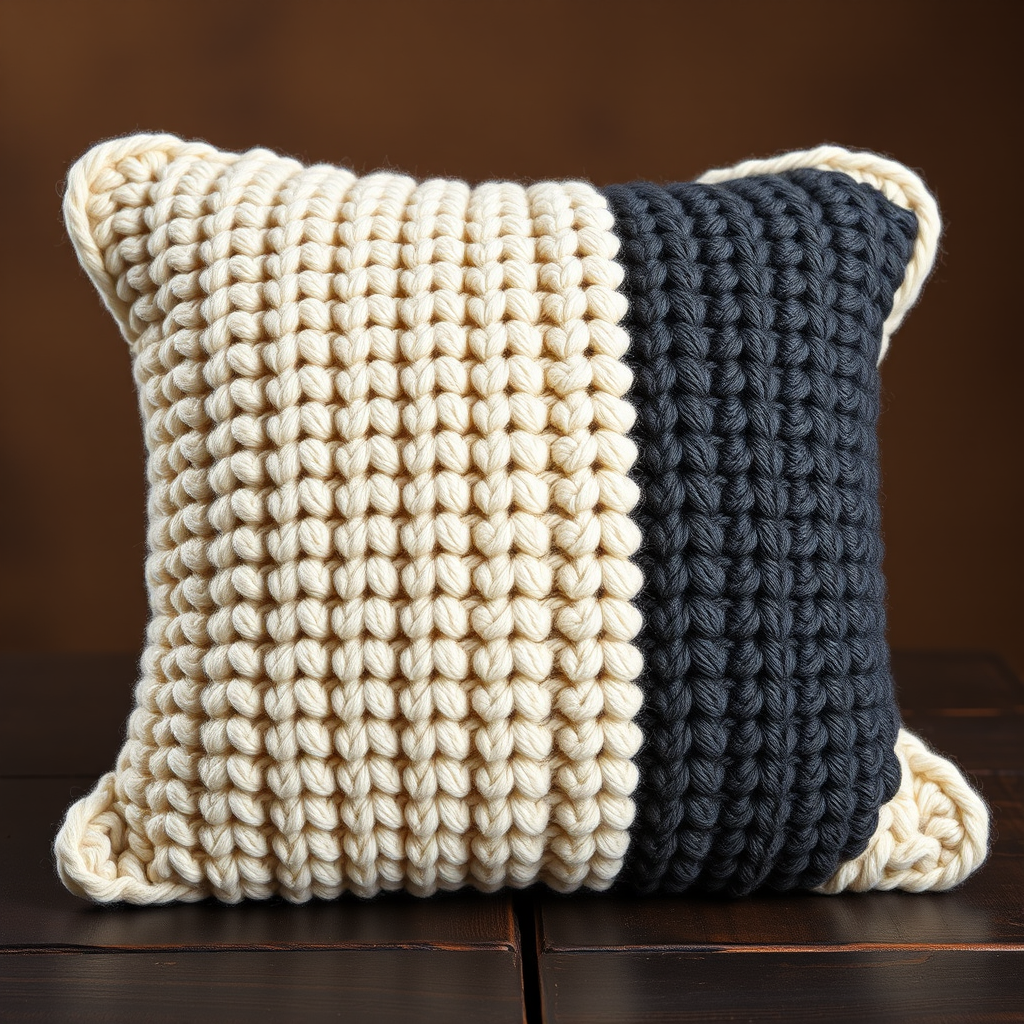
Elevate your living space with the Woven Ripple Pillow Cover, a stunningly textured throw pillow that brings modern elegance and cozy warmth to any room. This free knitting pattern features a unique woven ripple stitch on the front panel, creating a mesmerizing play of light and shadow through alternating knit and purl bumps. The back panel is worked in a smooth stockinette stitch in a contrasting charcoal gray, offering a clean, minimalist finish. Designed for the intermediate knitter, this project is both rewarding and practical—perfect for adding a handmade touch to your home decor. With chunky yarn and simple shaping, you'll create a plush, 18-inch square pillow that looks like it came straight from a boutique.
Materials Needed
Before you begin, gather the following supplies. All materials are readily available at most craft stores or online.
- Yarn:
- 2 skeins of Lion Brand Wool-Ease Thick & Quick (80% acrylic, 20% wool; 106 yds/97 m per 170g skein) in color 'Fisherman' (Color A) – for the front panel and seaming.
- 1 skein of Lion Brand Wool-Ease Thick & Quick in color 'Charcoal' (Color B) – for the back panel.
- Needles & Notions:
- US 11 (8 mm) knitting needles (straight or circular, as preferred).
- Tapestry needle for weaving in ends and seaming.
- Stitch markers (optional, for keeping track of pattern repeats).
- Gauge: 12 stitches and 16 rows = 4 inches in stockinette stitch (knit on RS, purl on WS). Always check your gauge to ensure the correct finished size.
- Finished Size: Approximately 18 inches wide by 18 inches tall (fits a standard 18x18 inch pillow form).
Step-by-Step Instructions
This pillow cover is knitted in two separate flat pieces (front and back) and then seamed together. Follow each step carefully for a professional finish.
Front Panel (Make 1)
The front panel uses the Woven Ripple stitch pattern, which creates a textured grid. Work the pattern as written.
- With Color A (Fisherman), cast on 40 stitches loosely. (Tip: Use a long-tail cast-on for a neat edge.)
- Row 1 (Right Side – RS): Knit all stitches across.
- Row 2 (Wrong Side – WS): Purl all stitches across.
- Row 3 (RS): *Knit 2, purl 2; repeat from * to end of row. (You will end with k2 if you have an even number of stitches.)
- Row 4 (WS): *Purl 2, knit 2; repeat from * to end of row.
- Row 5 (RS): Knit all stitches across.
- Row 6 (WS): Purl all stitches across.
- Row 7 (RS): *Purl 2, knit 2; repeat from * to end of row.
- Row 8 (WS): *Knit 2, purl 2; repeat from * to end of row.
- Repeat Rows 1-8 until the piece measures 18 inches from the cast-on edge, measured flat. Important: End after completing a Wrong Side row (Row 2, 4, 6, or 8). This ensures the pattern is symmetrical.
- Bind off all stitches loosely in pattern (knit the knits and purl the purls as they appear). Do not cut the yarn yet – you will use it for seaming.
Back Panel (Make 1)
The back panel is worked in simple stockinette stitch for a smooth, solid contrast.
- With Color B (Charcoal), cast on 40 stitches loosely.
- Row 1 (RS): Knit all stitches across.
- Row 2 (WS): Purl all stitches across.
- Repeat Rows 1-2 (stockinette stitch) until the piece measures 18 inches from the cast-on edge, ending with a WS row.
- Bind off all stitches loosely. Cut yarn, leaving a 12-inch tail for seaming.
Finishing & Assembly
Now it's time to join the pieces and insert the pillow form.
- Weave in all ends: Using the tapestry needle, weave in any loose yarn tails from the cast-on and bind-off edges on both panels. Trim excess yarn.
- Position the panels: Place the front panel (Woven Ripple side) and back panel (stockinette side) together with the Right Sides facing outward. This means the textured front and smooth back will both be visible. Align the edges carefully.
- Seam three sides: Thread the tapestry needle with the long tail of Color A (Fisherman) from the front panel. Using a whipstitch (or mattress stitch for an invisible seam), sew together three sides of the pillow cover: the two side edges and the top edge. Leave the bottom edge completely open. Tip: Work through both loops of the edge stitches for a sturdy seam.
- Insert the pillow form: Gently insert an 18x18 inch pillow form into the cover through the open bottom. Adjust the corners so they are fully filled.
- Close the remaining side: Using the same Color A yarn and whipstitch, sew the bottom edge closed. Weave in the final end securely.
- Optional – Secure closure: For a more polished look or easy removal, you can sew buttons or a zipper onto the bottom edge before seaming. If using buttons, create buttonholes on the back panel edge during the bind-off, or sew them on after assembly.
Your Woven Ripple Pillow Cover is complete! Fluff the pillow and place it on your sofa, bed, or favorite reading chair. The rich texture and subtle color contrast will add a modern, cozy vibe to any space. Happy knitting!



