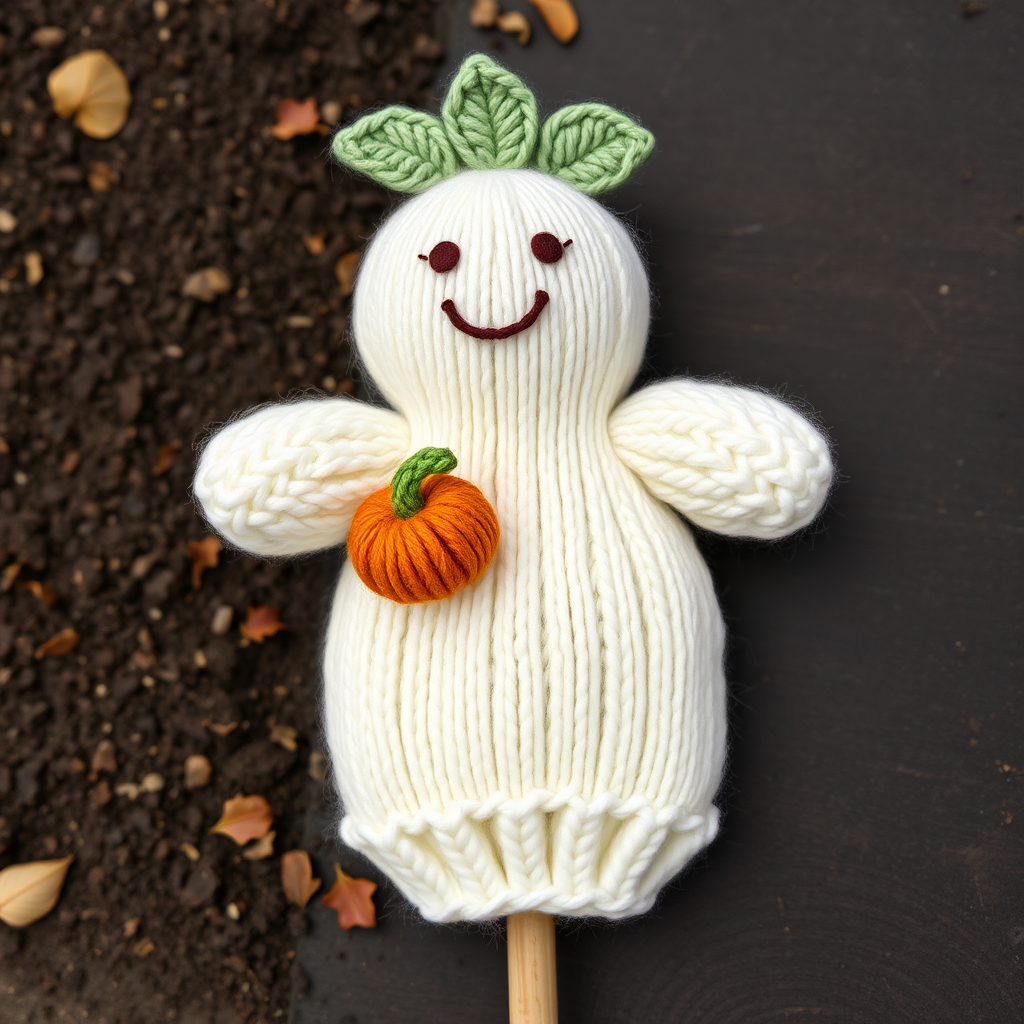
Whispering Willow Ghost Stake Free Pattern – Knitted Garden Sentinel

Whispering Willow Ghost Stake: A Beginner-Friendly Knitted Garden Sentinel
Imagine a soft, glowing guardian watching over your garden as the evening light fades. The Whispering Willow Ghost Stake is a charming, hand-knitted garden decoration that brings a gentle, whimsical presence to your outdoor space. With its trailing arms swaying in the breeze and a friendly embroidered face, this ghost adds cozy fall charm without a single sharp edge. Best of all, this pattern is designed with beginners in mind—it uses basic knit and purl stitches, simple decreases, and straightforward seaming. Let's get started on creating your very own garden sentinel!
Materials Needed
Before you begin, gather the following supplies. All items are readily available at craft stores or online.
- Yarn: Worsted weight cotton or cotton-blend yarn in ivory/cream (approximately 200g) for the ghost body. You will also need a small amount of black yarn for the face embroidery.
- Knitting Needles: US 7 (4.5mm) knitting needles.
- Notions: Tapestry needle for seaming and embroidery, stitch markers (optional but helpful), and scissors.
- Stuffing: Polyester fiberfill for lightly stuffing the head and upper body.
- Optional: A wooden garden stake (about 1 inch in diameter) for placement, and a small amount of matching yarn for a lining tube if you prefer a snug fit.
Gauge: 18 stitches and 24 rows = 4 inches in stockinette stitch. (Always check your gauge to ensure the correct size, though this project is forgiving.)
Step-by-Step Instructions
This pattern is knitted flat in one piece from the bottom up, then seamed and stuffed. The ghost is designed to slip over a wooden garden stake for easy placement. Follow these detailed instructions carefully, and you'll have a beautiful garden companion in no time.
Head and Body (Knitted in One Piece)
We'll start by creating the main body and head. This section is worked flat, back and forth on your needles.
- Cast On: Cast on 40 stitches using your preferred method.
- Row 1 (Right Side - RS): Knit all stitches.
- Row 2 (Wrong Side - WS): Purl all stitches.
- Repeat Rows 1-2: Continue repeating these two rows until your piece measures 8 inches from the cast-on edge. This forms the lower body of the ghost.
Shaping the Head
Now we will begin decreasing stitches to shape the rounded head. Follow these rows exactly.
- Next row (RS): *K2, k2tog*; repeat from * to * across the row. (You will decrease 8 stitches, leaving 32 stitches on your needle).
- Next row (WS): Purl all stitches.
- Next row (RS): *K1, k2tog*; repeat from * to * across the row. (You will decrease 8 stitches, leaving 24 stitches on your needle).
- Next row (WS): Purl all stitches.
- Next row (RS): K2tog across the row. (You will have 12 stitches remaining).
- Next row (WS): Purl all stitches.
- Finish: Cut your yarn, leaving a long tail (about 12 inches). Thread this tail through a tapestry needle, then thread it through the remaining 12 stitches on your knitting needle. Slide the stitches off the needle and pull the yarn tight to close the top of the head. Do not seam the sides yet—leave this for the finishing step.
Trailing Arms (Make 2)
These long, graceful arms are knitted separately and attached later. They give the ghost its signature flowing silhouette.
- Cast On: Cast on 6 stitches.
- Work in Stockinette Stitch: Knit all stitches on the right side, purl all stitches on the wrong side. Continue this pattern until the piece measures 12 inches from the cast-on edge.
- Next row (RS): K2tog, k2, k2tog. (You will have 4 stitches remaining).
- Next row (WS): Purl all stitches.
- Next row (RS): K2tog, k2tog. (You will have 2 stitches remaining).
- Next row (WS): Purl all stitches.
- Next row (RS): K2tog. Cut yarn, leaving a small tail, and pull it through the remaining stitch to secure. Weave in this end.
Embroidering the Face
Using your black yarn and a tapestry needle, you'll bring your ghost to life with a friendly expression.
- Position: Lay the knitted body flat with the right side facing you. Identify the head area (the shaped, decreased section).
- Eyes: Using a satin stitch, embroider two simple oval eyes. Place them about 2 inches apart, centered horizontally on the head. Each eye should be about ½ inch wide and ¾ inch tall. The satin stitch involves laying parallel stitches close together to fill in the shape smoothly.
- Mouth: Below the eyes, embroider a small, open "o" shaped mouth using the same satin stitch. Position it about ½ inch below the eyes, centered.
- Tip: Keep the embroidery neat and tight so it doesn't snag on garden plants.
Finishing and Assembly
Now it's time to bring all the pieces together. Take your time with the seaming for a polished result.
- Seam the Body: With the right sides of the body together (the embroidered face facing inward), use your tapestry needle and the long tail from the top of the head to seam the side edges. Start from the cast-on edge at the bottom and sew upward to the neck area, leaving the bottom edge completely open. Turn the body right side out.
- Stuff the Ghost: Lightly stuff the head and upper body (down to about 4 inches from the top) with polyester fiberfill. Do not overstuff—you want it soft and plump. Leave the lower body completely unstuffed so it can drape gracefully over the garden stake.
- Attach the Arms: Position each arm on the sides of the body, about 1 inch below the neck (the point where the decreases begin). Using a whip stitch and matching yarn, securely sew the top edge of each arm to the body. Let the arms hang naturally down the sides.
- Optional Lining Tube: If you want a snug fit over your stake, create a simple tube. Cast on 20 stitches, join in the round, and knit in stockinette stitch for 4 inches. Bind off and sew this tube inside the bottom opening of the ghost. Otherwise, the open bottom will slip directly over a 1-inch diameter stake.
- Weave in All Ends: Use your tapestry needle to weave in any remaining yarn tails on the inside of the ghost to keep the exterior clean.
Your Whispering Willow Ghost Stake is now complete! Slip it over a wooden garden stake, place it among your plants, and enjoy the soft, whimsical glow it brings to your garden. This project is perfect for fall decorating, Halloween, or simply adding a touch of handmade charm to your outdoor space year-round. Happy knitting!